Category: Blog

Drywall contractors in San Jose

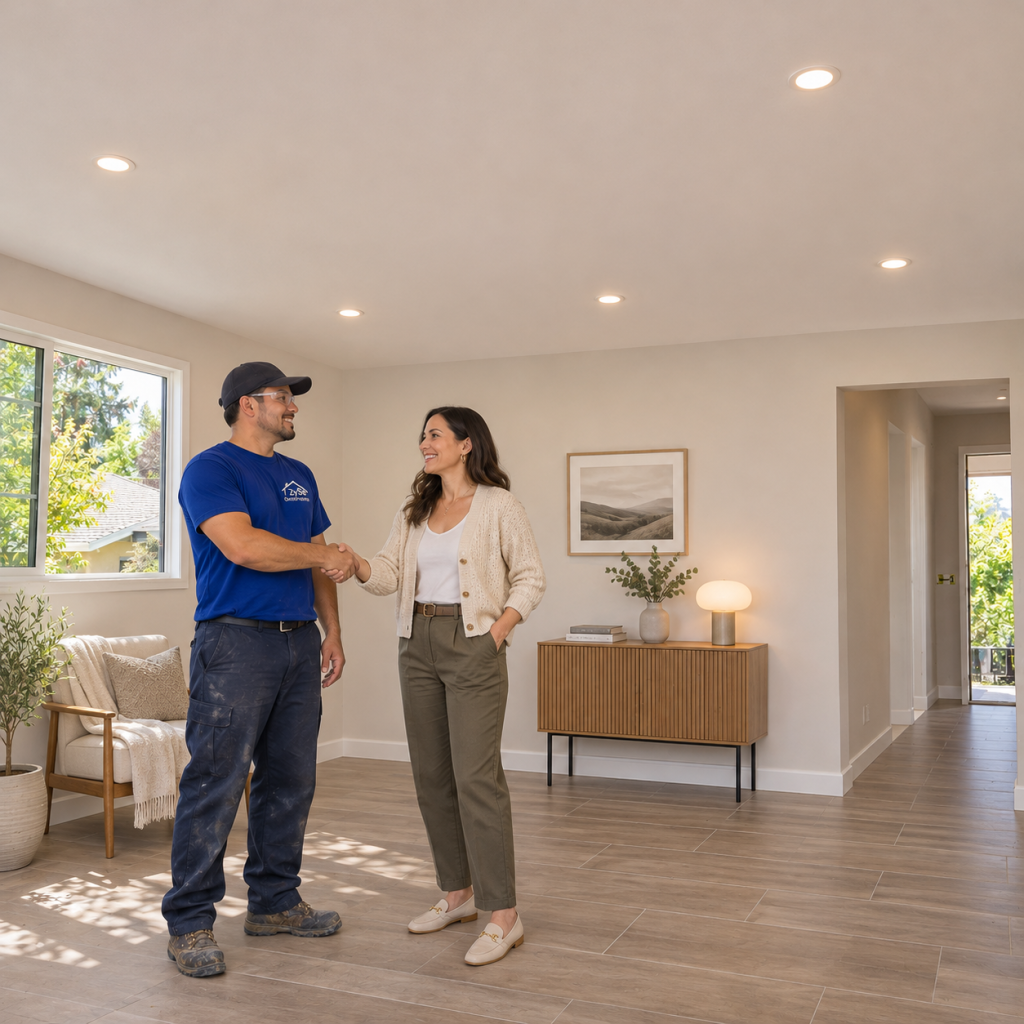
If you’re planning to move an outlet or change a shower valve, tell us before the new drywall goes up. We need access inside that wall. Get a free estimate for your project, and we’ll discuss what needs opening and how you want the room finished. At ZySe Construction, our drywall contractors handle walls and ceilings in San Jose, from repairs around new plumbing to complete room renovations. Our own team performs the work, including plumbing and electrical, without subcontracting it out.

Leave the wall open
Framing before finishing
Hanging the sheets
The finish takes visits
Paint, wallpaper, and tile
What the estimate includes

Leave the wall open

We ask about the fixtures early. A recessed medicine cabinet takes up space inside the wall. A floating vanity needs suitable backing. Even a towel bar has a location worth deciding before we cover the studs.
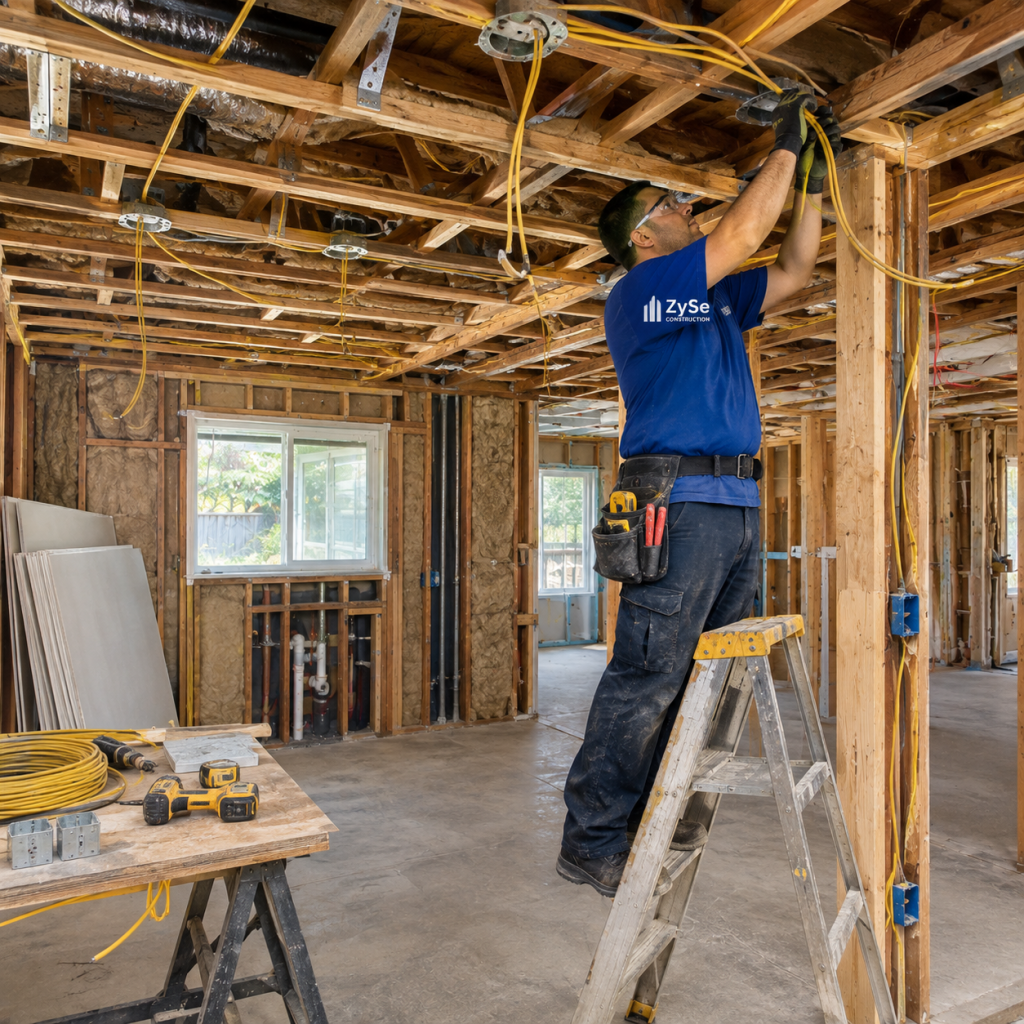
Take the medicine cabinet as an example. Its opening might land across a planned cable route. With the framing exposed, we can coordinate another route or reconsider the cabinet position. After painting, that same conversation involves cutting a hole in a finished wall.

You don’t need every decorative choice settled yet. Bring the fixture specifications you already have.

Our plumbing team needs those details too. We check the sink drain against the proposed vanity and set shower controls for the finished wall thickness. Otherwise, a drawer can hit the trap, or a valve can sit too far behind the tile. Testing and any required rough inspections happen before we cover the work.

Before closing the ceiling, we check the exhaust duct route and its connections. A duct squeezed around framing or left disconnected becomes much harder to correct once the board is up. We resolve access conflicts, complete the required insulation and air sealing, and keep electrical junction boxes accessible.

Framing before finishing

A straightedge across the studs shows where the board will sit. If one stud bows into the room, fastening a sheet to it carries that hump into the finished wall. We correct the framing while we can reach it.

Patches need support as well. An opening can have neat edges and still leave nowhere to fasten the replacement piece. We add backing, then fit the patch.

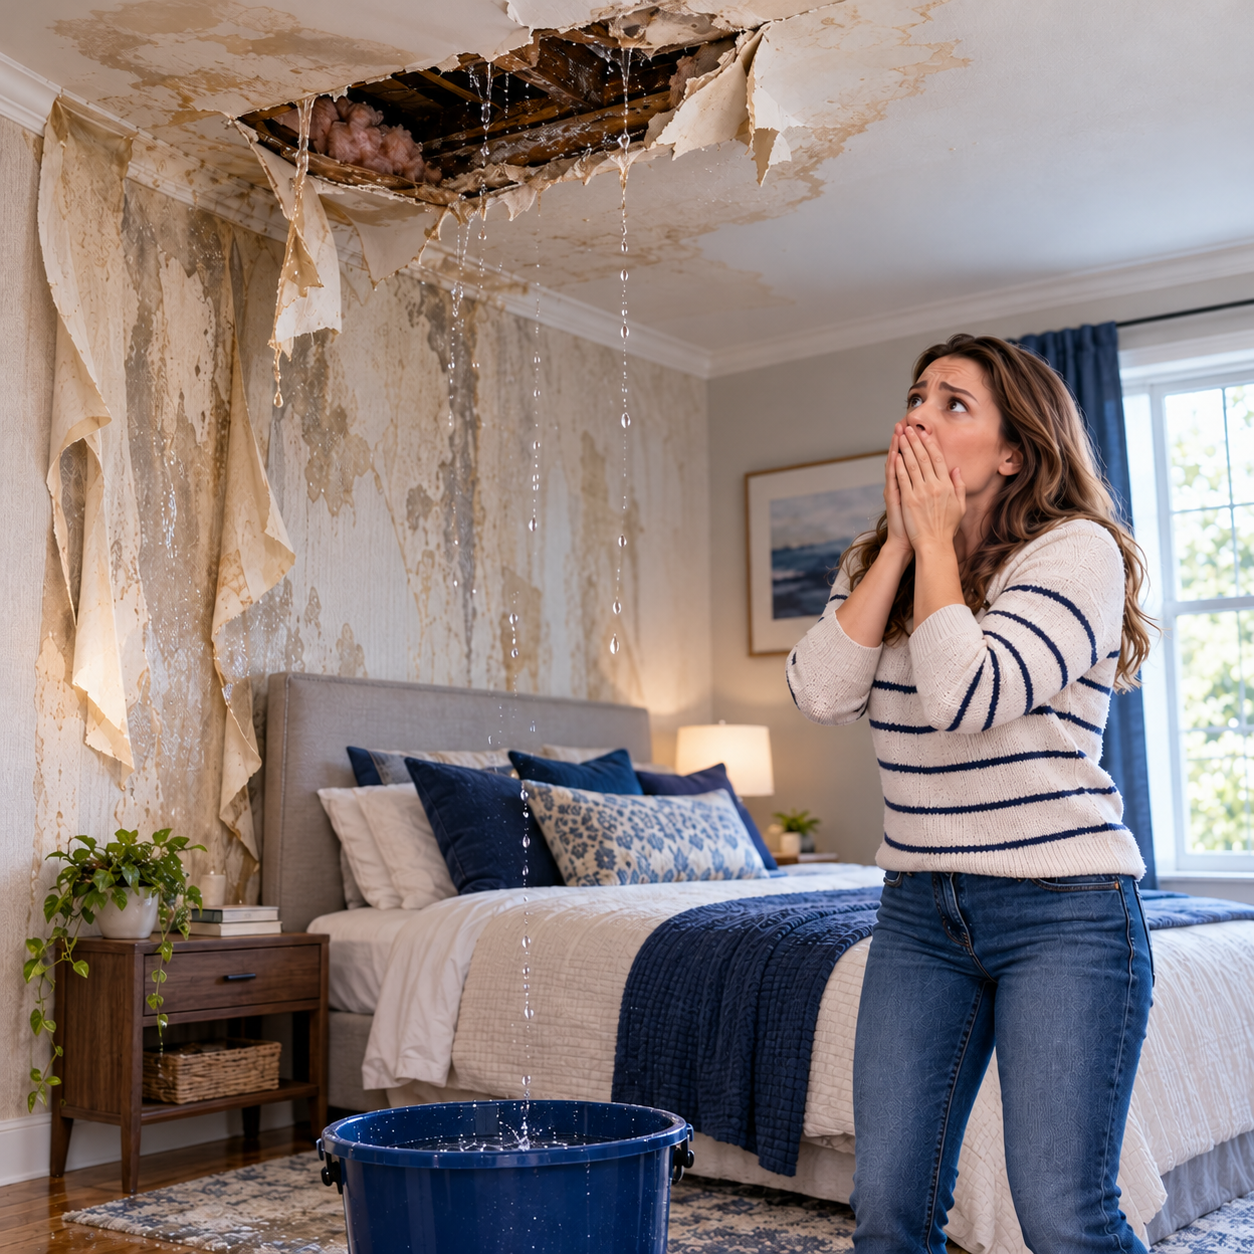
After a leak, the stain doesn’t tell us everything. Before rebuilding, we need to establish that the water source has been addressed and the affected assembly is dry enough to close. The amount of material that needs replacing may only become clear once we open it.

Hanging the sheets

Our sheetrock installers work out the joints before cutting. Around doorways and other openings, we avoid unnecessary narrow pieces where the specified assembly allows a better layout.
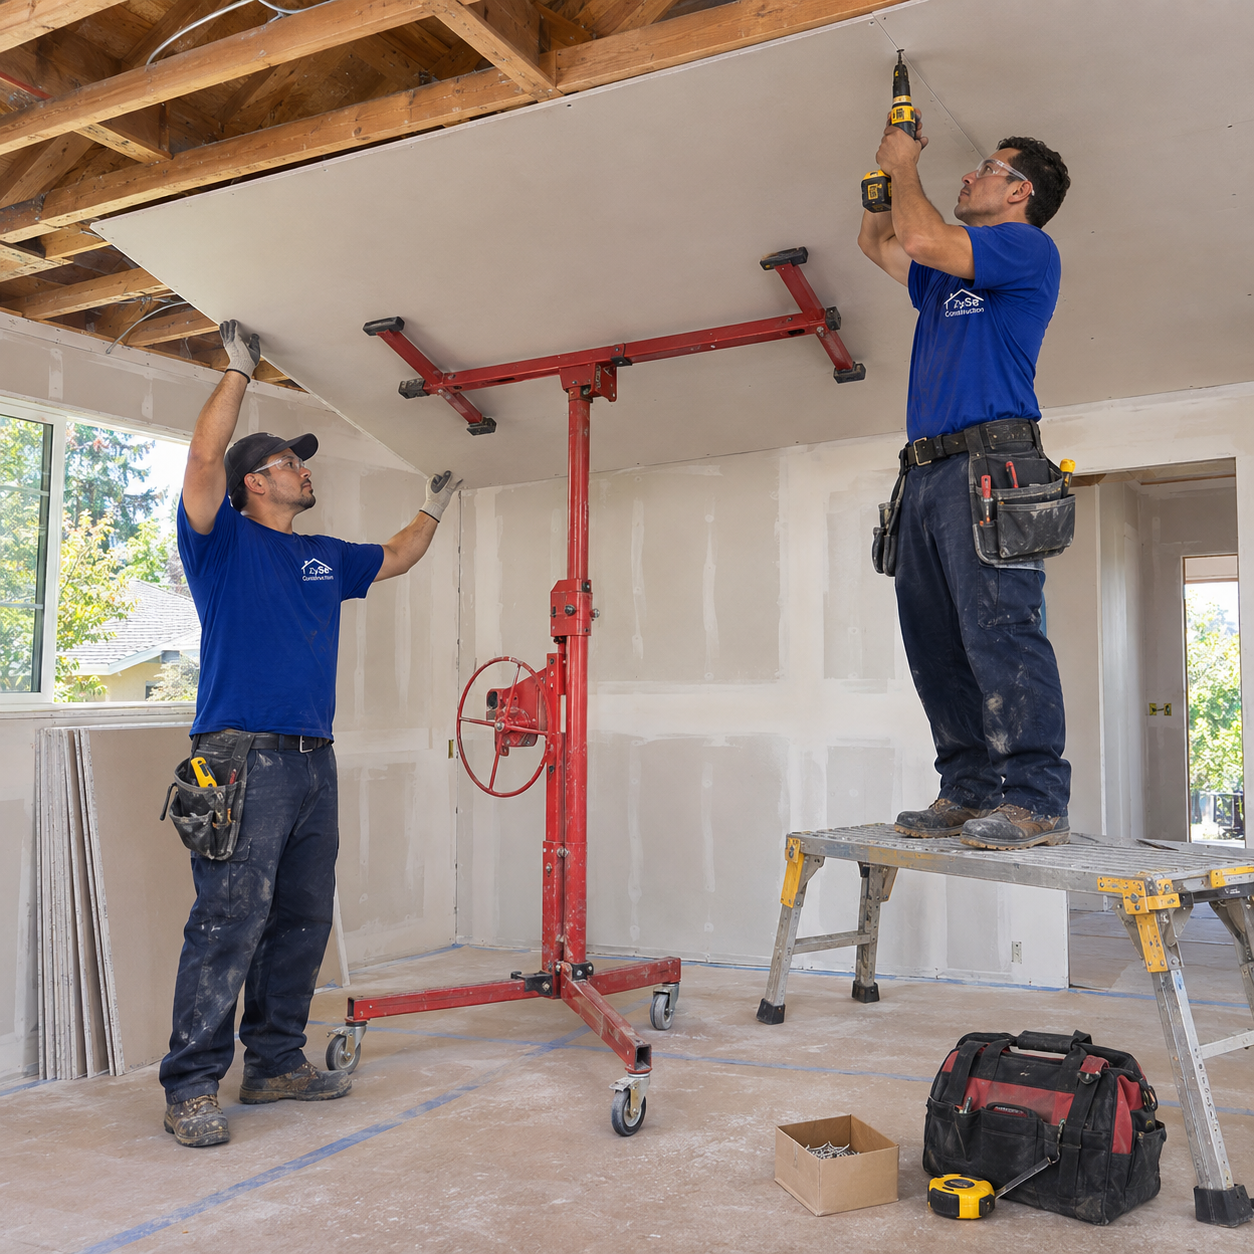
For ceilings, we check the framing spacing before choosing the board. Panel thickness, orientation, and fastening have to suit the ceiling assembly. A panel lift holds the sheet while we position and secure it. Fire-rated construction needs its specified assembly followed, including the details around joints and penetrations.

At the screw gun, depth matters. The head should sit slightly below the face without tearing through the paper. If a screw breaks through, we correct the fastening there. Filling the hole later won’t restore its grip.

We also check openings around electrical boxes before finishing starts. A cut that extends beyond the cover plate means another patch.

The finish takes visits

Hanging board can move quickly. Finishing usually brings us back over the same surface several times.

The first pass embeds the tape and starts the corner treatment. Later coats spread wider across the seams, gradually blending the joint into the surrounding board. Fastener heads get covered too. Between passes, the compound needs the appropriate drying or setting conditions.

A thick patch can still hold moisture underneath when its surface looks ready. That sometimes means leaving it alone and returning later.

Show us the paint sample before we agree on the finish level. A dark wall beside a large window can reveal seams that are hard to notice under ordinary room lighting. For demanding finishes, Level 5 includes a skim coat across the entire surface.

Before priming, we check with light running across the wall. We touch up ridges and low spots, sand with dust extraction, and remove the remaining dust.

Paint, wallpaper, and tile

Paint goes over a prepared, primed surface. Bare panel paper and joint compound absorb differently, which can leave visible bands through the decoration. A suitable drywall primer helps even out that difference before the finish coats.

For wallpaper, bring the sample if you have it. Thin or reflective paper can show small surface defects. We prepare the wall accordingly and use a wallcovering primer compatible with the paper and adhesive.

Tile areas need a suitable, flat substrate. The joint treatment follows the selected tile system, so we don’t automatically give those walls the same mud-and-primer treatment as a painted bedroom.

Shower walls are different. We don’t put up bare drywall and tile straight over it. The waterproofing system determines what can go underneath and how we prepare it. For example, Schluter KERDI allows drywall as a substrate when installed according to the system’s requirements. We follow those details through the corners, seams, and plumbing penetrations.

What the estimate includes

Drywall installation cost is difficult to judge from floor area alone. A small bathroom might need ceiling patches, several plumbing openings, and repairs where old tile came off. An empty rectangular room can be much easier to work in.

When comparing sheetrock contractors, ask where each quote stops. “Finished drywall” might mean taped and sanded, while you’re expecting a painted room. We separate the board work, surface finish, and decoration so you can see what’s included.

For a kitchen or bathroom renovation in Cupertino or Sunnyvale, we can include drywall installation in the remodel. If you only need the walls and ceilings done, we can quote that work separately.

If you’re in Campbell, Los Gatos, or Milpitas, send us a few photos of the room. One wide shot and a close-up of the problem area are a good start. Tell us whether you’re planning paint, wallpaper, or tile when you request your free estimate.


Partnership program for Local store owners

Partnership program

Who we work with
Work you can send
Joining your project
Introducing a customer
How payment works
Keeping the job moving
Send us the details

Have a job you need help finishing? Or a customer whose project falls outside the work you normally take on?

We work with contractors, property professionals, and private individuals throughout San Jose and the Bay Area. We can take responsibility for a specific part of your project or speak directly with a customer you introduce. Send us what you have. Photos, a location, and a short description are enough to begin.

Track your referrals

Enter your partner code and press Enter to view your referrals and their current statuses.

Interested in becoming a ZySe partner? Call +1 (669) 699-8939 to apply.

Who we work with

Our partnership program is open to businesses and individuals who need a contractor for a project or want to introduce a customer.

Partnership program for Local store owners

  • Partnership program for construction, renovation and remodeling companies.
  • Partnership program for architects and designers.
  • Property managers. We handle renovations and repairs for the homes and rental properties you manage.
  • Local store owners. Give your customers a discount on their remodel and earn a partner commission on qualifying projects.
  • Independent tradespeople. If your part of the job is nearly finished and another crew needs to follow, we can discuss the handoff.
  • Private individuals. Know someone planning a renovation or needing repairs? You can introduce us with their permission.

For store owners, we provide a small countertop display with flyers carrying your unique Partner ID. Customers enter that code on our website or mention it to our team when requesting an estimate to receive 10% off eligible kitchen, bathroom, or home remodeling work. Your store receives a commission on qualifying orders under terms agreed in writing before launch, where legally permitted. We prepare the promotional materials and handle customer inquiries, estimates, and the construction work.

We also welcome restoration companies into our partnership program. Once your team has completed water removal and drying, we can take over the agreed reconstruction work: drywall, flooring, electrical repairs, and paint. We do not provide extraction or emergency drying.

Work you can send

We take on kitchen, bathroom, and interior remodeling, as well as smaller, clearly defined scopes.

That might mean a shower that needs waterproofing and tile, a kitchen waiting for plumbing and electrical rough-in, or several rooms that need rebuilding after a leak.

Partner with ZySe Construction

Our work can include:

  • Floor and wall tile, shower installations, and backsplashes.
  • Substrate preparation and waterproofing.
  • Drywall, ceiling repairs, painting, and wall finishes.
  • Water supply, drains, and sewer work.
  • Wiring, outlets, switches, and lighting.
  • Ventilation and exhaust systems.
  • Post-water-damage reconstruction.
  • ADU construction and conversions.

Before accepting a job, we review the requirements, confirm that the work fits our qualifications, and check when we can realistically schedule it.

Joining your project

If you already hold the customer contract, we can work as your subcontractor.

We need to know where our scope starts and ends. For tile work, for example, who prepares the substrate? Who supplies the tile? Has waterproofing been included, and who is responsible for it? We settle those questions before pricing and scheduling.

The same applies to access. If the plumber still needs the wall open, tell us. We would rather adjust the start date than arrive with materials and find that the room is not ready.

We agree on the price, payment schedule, and customer communication before work begins. You keep your relationship with the homeowner, and our crew follows the arrangements made with your company.

Introducing a customer

You can also put us in touch with someone who needs a contractor. With their permission, send their contact details and a few words about the work.

Partnership program for architects and designers

We handle the follow-up, arrange an assessment when needed, and prepare the estimate. If the customer proceeds, they contract with us directly.

Please speak with us before promising a referral payment to anyone. Compensation is not available for every type of introduction, and California rules restrict some arrangements. We check what is permitted and put any agreed terms in writing beforehand.

If we already have an active inquiry for the same project, we will let you know at the start.

How payment works

For subcontract work, we agree on a price for our scope and a payment schedule. Your pricing to the homeowner remains between you and your customer.

For introductions where compensation is legally permitted, we can discuss an individual percentage. We agree on both the percentage and what it applies to before moving forward.

We base that calculation on the agreed work the customer pays for—not the first estimate sent out. Customers sometimes reduce the scope, change materials, or postpone part of a renovation. The payment needs to reflect the job that goes ahead.

We also spell out whether materials or other charges are included. Additional work is discussed separately, and canceled or unpaid work does not generate compensation.

Keeping the job moving

Tell us what is finished, what is still open, and which trades remain on site. A few current photos help more than a long description of what the room is supposed to look like.

We assign a point of contact for our work. If we find something that changes the price or scope, we bring it back for approval before proceeding.

On subcontract projects, we do not use access to your customer to pitch unrelated work behind your back. If the homeowner asks us for something extra, we follow the communication process agreed with you.

At the end, we walk through our scope, address the agreed punch-list items, and complete the final construction cleaning included in the job.

Send us the details

Have an upcoming project or a job already underway? Send the location, photos, available plans, and preferred timing. Let us know whether you need a subcontractor or want to introduce a customer.

Tile contractor- bathroom installation and tiling

Tile contractors: cost and scope

Regional tile pricing
What affects cost
Work behind tile
Choosing an installer
Comparing estimates
Getting your price

Tile installation prices in San Jose cover a wide range. A straightforward floor may fall near the regional average, while showers, mosaics, large-format porcelain, and substrate repairs cost more. To find out what your tile and room will actually require, send us the dimensions, photos, or material link through our Get free estimate form. Our team will review the details and calculate the price for your specific project.

Regional tile pricing

Homeowners sometimes search “contractors tile” expecting one standard square-foot rate. In practice, the San Jose market has a broad installed range. Straightforward ceramic or porcelain flooring commonly starts around $10–$20 per square foot, but that figure only works as an early planning number. Local published estimates run from roughly $7 to more than $20 per square foot, depending on the material and installation conditions.

The number can move as soon as we inspect the room. Existing tile may need demolition. Concrete can have cracks or high spots. A wood subfloor may flex near a doorway. None of that appears in an online calculator.

The cost to lay tile also depends on what the quoted rate includes. Some prices cover setting labor only. Others include surface preparation, thinset, grout, cuts, disposal, and final cleanup. Two contractors can quote the same room and still be pricing different jobs.

That is why we do not give a final number from square footage alone. Send us the basic project information, and we can tell you which part of the regional range fits your installation.

What affects cost

Tile selection changes labor before we even open a bag of thinset. Standard porcelain usually gives us a predictable layout. Large-format pieces need a flatter surface and more handling. Mosaic sheets create more grout joints, while herringbone adds cuts along nearly every wall.

Get free estimate

Small bathrooms often cost more per square foot than open floors. Around a toilet flange, vanity, doorway, curb, and shower drain, almost every row needs another measurement. A 40-square-foot bathroom is not simply half the work of an 80-square-foot room.

The condition underneath matters just as much. I have walked into rooms where the old tile looked reasonably flat, but the exposed floor told a different story. One low corner can take several rounds of patching. Annoying, but better than watching a finished tile crack later.

If you want a realistic tile cost with installation, send a photo of the existing surface along with the tile you selected. Our estimator can usually spot the obvious labor items before scheduling an on-site visit.

Work behind tile

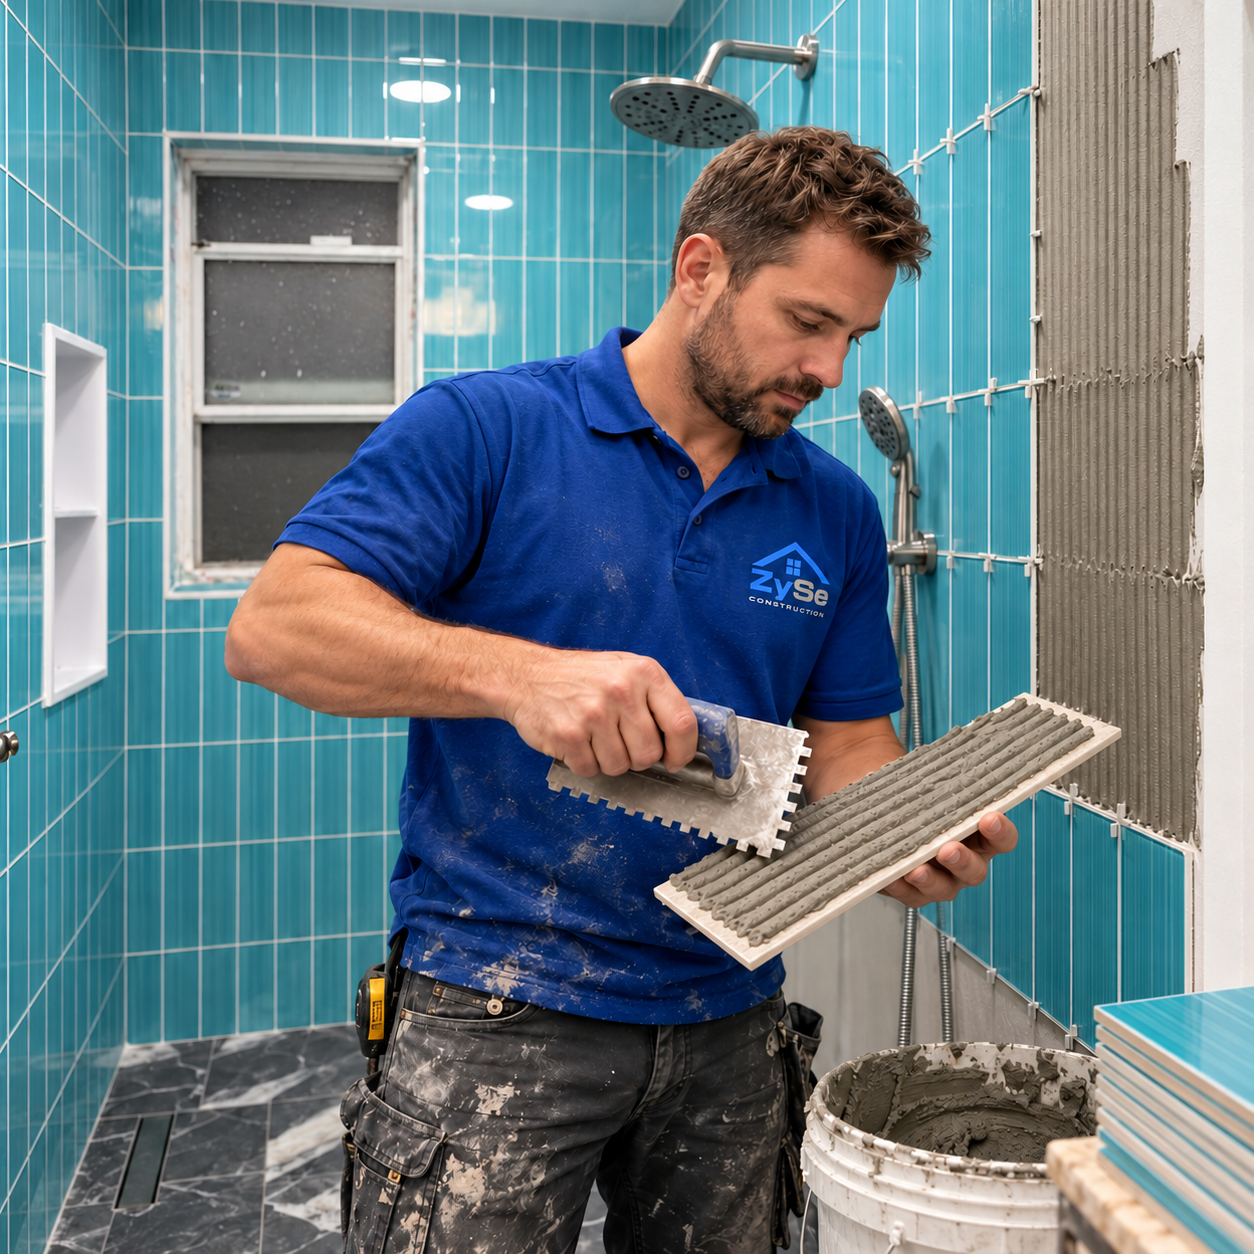
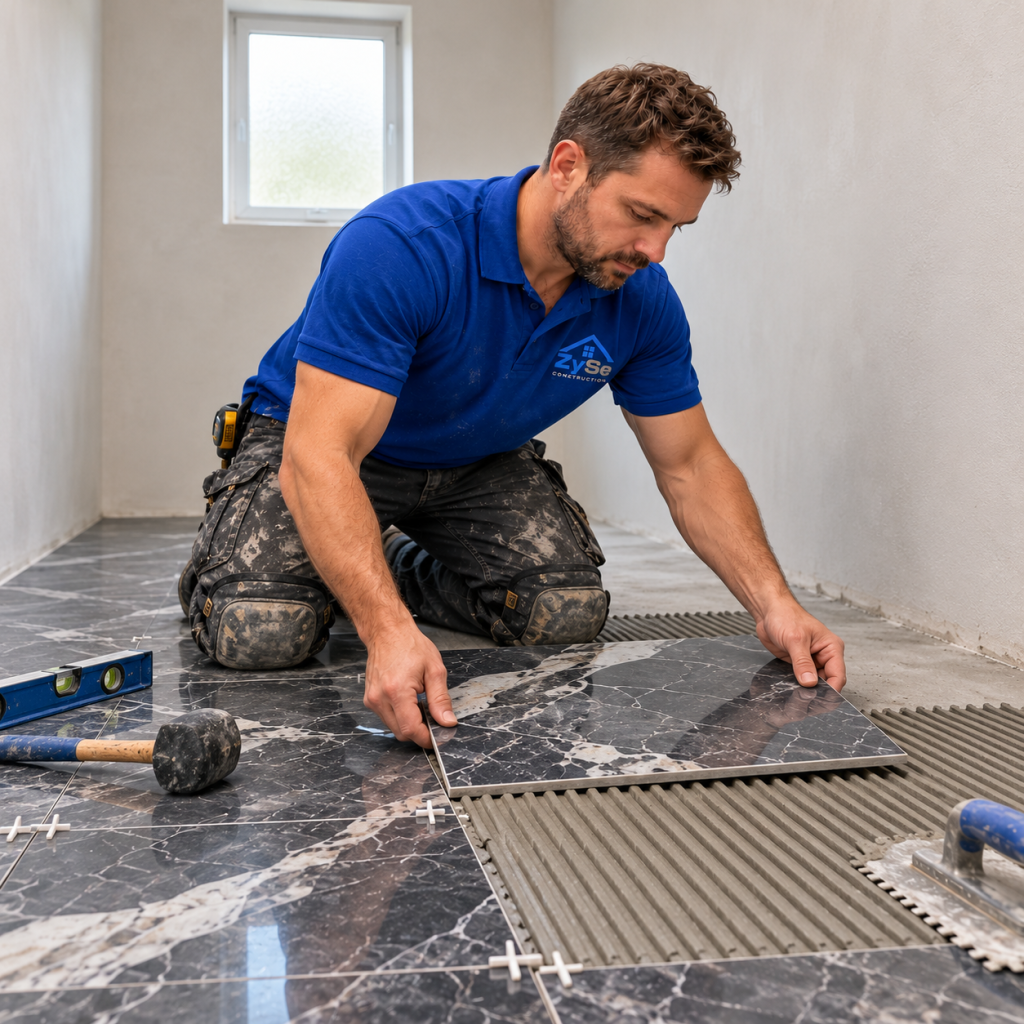
A tile installer spends plenty of time on work the homeowner will never see. We check the substrate with a long level, scrape ridges, fill low areas, and confirm the base is solid. If the surface moves, the tile assembly moves with it.

Wet areas need additional planning. A shower involves the pan, waterproofed walls, corners, plumbing penetrations, drain connection, and transitions outside the enclosure. Tile and grout provide the finish. The waterproofing system behind them manages the water.
Then we lay out the room. Starting with a full tile at the wrong wall can leave a narrow strip beside the tub or vanity. Moving the pattern a few inches may save several ugly cuts. That decision takes ten minutes on the floor and stays visible for years.

After setting, we grout the field and use flexible sealant at movement joints and changes of plane. Edge trim, baseboards, transitions, protection removal, and cleanup should also be accounted for in the proposal.

Choosing an installer

For a standalone tile project in California, homeowners should look for a contractor with the appropriate C-54 Ceramic and Mosaic Tile classification. This classification covers surface preparation and the installation of ceramic, mosaic, stone, shower tile, and related assemblies.

The licensed contractor may perform the installation directly or manage a qualified tile installer. For a complete kitchen or bathroom remodel involving plumbing, electrical, carpentry, and tile, a General Building contractor can coordinate the trades under one project.

Tile contractor Bathroom floor tile installation cost

California places limits on single-trade work performed under a “B” license. The contractor must hold the relevant specialty classification or use an appropriately licensed specialty contractor.

For a backsplash or tile floor, a C-54 contractor is usually the direct fit. For a full remodel, it often makes more sense to have one general contractor control the schedule, inspections, and trade overlap.

Comparing estimates

Do not compare proposals by the bottom line until you compare the scope. One estimate may include demolition, haul-away, floor preparation, setting materials, grout, trim, and cleaning. Another may contain one short line: “install owner-supplied tile.”

Ask what happens if the installer finds damaged plywood, cracked concrete, or an uneven wall. The answer should appear in writing. Otherwise, the least expensive proposal can change after demolition.

For shower work, confirm who handles waterproofing and how the system connects to the drain. For flooring, ask whether leveling and transitions are included. If tile runs beneath appliances or around cabinets, that needs to be clear as well.

CSLB recommends obtaining at least three written bids based on the same plans, specifications, and scope. Homeowners can also verify license status through the CSLB website before signing a contract.

Getting your price

An online average can tell you whether a project is roughly within budget. It cannot see the floor, count the difficult cuts, inspect the shower walls, or confirm whether demolition is required.

For a project-specific estimate, send us the room dimensions, several photos, your ZIP code, and a link to the tile. If you have not selected the material yet, tell us where it will be installed. We can explain which options fit the surface and expected use.

Get your free estimate before ordering tile. We will review the scope, identify the likely preparation work, and give you a price based on your actual installation—not a generic online average.

restoration of water damage

Water damage restoration

Stop the source
Dry before rebuilding
Walls and ceilings
Floors and trim
Matching the finish
Planning the repair

Water restoration begins with finding out what became wet, what can still be saved, and what needs replacement. A ceiling stain or swollen baseboard rarely shows the full repair scope. Send us photos and a short description through the Get free estimate form, and we can review the visible damage before arranging an inspection.

Stop the source

Before we rebuild anything, the leak has to stop. That may involve a plumber, roofer, appliance technician, or another appropriate trade. Installing new drywall under an active roof leak only creates the same repair twice.

water restoration

If water is still standing, materials remain soaked, or sewage is involved, the first call should be to a qualified water mitigation company. Its crew handles extraction, containment, drying equipment, moisture tracking, and disposal of contaminated materials. Our reconstruction work starts after the affected area is safe, dry, and ready to rebuild.

Take photographs before demolition whenever it is safe. Keep invoices, drying reports, and notes about the source. Those records also help us understand what the previous crew removed and why.

Dry before rebuilding

A wall can feel dry at the surface while the insulation or backside of the drywall remains damp. We check questionable areas with a moisture meter instead of trusting the paint color. Corners, bottom plates, cabinet toe kicks, and flooring transitions tend to hold moisture longer.

The EPA recommends drying wet materials within 24–48 hours when possible. Materials that cannot be properly cleaned and dried may need removal. This frequently applies to porous products such as insulation, ceiling tile, and damaged wallboard.

Sometimes the opening left by a mitigation crew looks larger than expected. Usually there is a reason. A tidy two-foot patch is useless if damp insulation continues into the next stud bay.

We begin water restoration reconstruction only after the drying stage is complete. Closing the wall early can trap moisture behind new finishes. The paint may look fine for a while, then a seam starts staining or the baseboard swells again.

Walls and ceilings

Drywall water damage repair is rarely just a coat of joint compound. We square up rough openings, inspect the exposed framing, replace damaged insulation where required, and add backing for the new board. Every edge of the patch needs solid fastening.

After hanging the board, we tape the joints and build the finish in several passes. Large ceiling patches need wider feathering because side light finds every hump. One extra check with a sanding light usually saves an ugly shadow after painting.

For drywall repair after water damage, matching the existing texture may take longer than installing the patch. Orange peel, knockdown, and older hand-applied finishes all behave differently. We test a small area before spraying the entire repair.

Ceiling water damage repair also requires checking what sits above the stain. Wet insulation, recessed lighting, roof framing, or plumbing may change the scope. A dark ring below a bathroom does not necessarily mean the leak began directly above it. Water travels along framing and pipes.

Do not simply paint over discoloration or visible mold. EPA guidance says the water source and mold problem should be addressed before painting or caulking.

Floors and trim

Wood floor water damage can appear slowly. Boards may cup, separate, darken, or lift at the edges several days after the leak. We first determine whether the moisture entered from above, below, or through an adjacent wall.


Some hardwood floor water damage can be stabilized when drying begins quickly and the boards remain sound. Other sections require replacement. Sanding a wet or badly distorted floor too soon can leave it uneven after the wood returns to its normal moisture level.

Replacement creates another problem: matching the existing boards. Species, width, milling profile, stain, age, and sunlight all affect the color. We may need to blend a wider section instead of placing one bright new board in the middle of an older floor.

Laminate and particleboard products are less forgiving. Once the core swells, it usually does not return to its original shape. Baseboards and door casing can have the same issue. The front may look acceptable while the bottom edge has already opened up.

Matching the finish

The repair should connect cleanly with the surrounding room. That means matching texture, paint sheen, trim profile, grout color, plank direction, and transition height. This is where water damage repair becomes remodeling work rather than emergency cleanup.

water damage restoration

Paint matching deserves a practical conversation. A small wall patch may blend when the original color and product are known. Older paint often has fading, previous touchups, and a different sheen from years of cleaning. In that case, painting from corner to corner gives a cleaner result than chasing a spot match.

The same applies to ceilings. A new patch in the center of an older ceiling may flash under daylight even when the color looks correct in the can. We price the smallest area that can be finished cleanly, then explain the alternative before work starts.

Our project manager keeps the remaining items together: drywall, texture, paint, flooring, trim, caulk, and final cleanup. Fewer handoffs usually mean fewer unfinished edges.

Planning the repair

When comparing water damage restoration companies, ask where mitigation ends and reconstruction begins. Some companies remove wet materials and operate drying equipment but do not reinstall drywall, flooring, cabinets, or finishes. Others manage both stages. The proposal should clearly identify who is responsible for each part.

A useful reconstruction estimate needs more than one close-up picture. Send one photo of the damaged area, one wider view of the room, and any pictures taken during demolition. Include the property location, known leak source, mitigation report if available, and the finishes you want restored.

If you need water restoration repairs in San Jose or the Bay Area, request a free estimate after the leak is controlled. We will review the damaged walls, ceiling, flooring, and trim, then prepare a repair scope based on what your home actually needs.

adu contractor

ADU construction in San Jose

A separate living space
Space for your family
Building for rental
Choosing your ADU
Plans and construction costs
From drawings to handover

ADU construction gives you another way to use the property you already own: a separate home for family, guests, or a tenant. Before choosing a layout, we need to check the lot, existing structures, and utility access. Send your address and a few photos through our Get free estimate form. We can discuss the options before you spend money on plans that may need changing.

A separate living space

What is an additional dwelling unit? The official term is accessory dwelling unit, or ADU. It is a secondary home with independent living facilities, including space for sleeping, cooking, and bathing. It can stand in the backyard, connect to the main house, or occupy converted existing space.

That distinction matters. Garage remodeling might give you a workshop or finished storage area. A room addition might enlarge your bedroom. An ADU creates another dwelling, with the construction and utility requirements that come with it.

Putting a sink and a sofa in the garage does not get you there. We still need to establish whether the structure can support the proposed conversion.

Space for your family

For some families, the goal is keeping parents close without sharing every part of the house. Their own entrance, kitchen, and bathroom allow more independence. You can have dinner together without sharing the morning bathroom queue.

An adult child may use the unit while studying or saving for a home. Guests can stay without turning the living room into a bedroom. Later, the same space may serve a different purpose.

We discuss that future use while reviewing additional dwelling unit designs. A layout for occasional guests may feel cramped for someone living there full-time. Storage, laundry, ventilation, and space around furniture need attention early.

If the unit is for an older relative, I would also look carefully at the path from the house. Steps, poor lighting, and an awkward shower entrance can make a new space difficult to use.

Building for rental

An ADU can provide rental income while you continue living in the main house. San Jose allows the house and ADU to be rented to different households. The city states that ADU rentals have a minimum term of 30 days, so nightly vacation bookings should not form the basis of the plan.

adu builders near me

Before treating rent as extra income, account for financing, insurance, maintenance, utilities, and vacancy. Check comparable rentals nearby. A listing across town with a different layout will not tell you what your unit can realistically earn.

The entrance deserves its own conversation. Where does a tenant receive deliveries? Can they reach the door without crossing your private patio? Where do the bins go?

For a rental, I would spend time on durable flooring, accessible plumbing shutoffs, and finishes that are straightforward to repair. An unusual fixture can look great until a replacement part takes weeks to arrive.

Choosing your ADU

Detached ADU construction creates a separate home on the lot. It offers more distance from the main residence, although the scope includes a foundation, roof, exterior walls, and utility connections. Backyard access can also affect how crews move equipment and materials.

Attached ADU construction adds an independent living unit connected to the existing house. We need to work through the roof connection, drainage, sound separation, and relationship between the two entrances. The new space should function comfortably alongside the original home.

A garage conversion to ADU starts with an existing shell. We assess the slab, framing, ceiling height, moisture conditions, and openings before deciding what can remain. Keeping the walls does not necessarily mean keeping everything behind them.

An ADU home addition expands the building to create another dwelling. If the addition only enlarges the main home, it is a different project. We establish that distinction before developing the scope.

Plans and construction costs

Additional dwelling unit plans need to fit the property as well as the household. A sewer route, easement, tree, or electrical service can affect placement. San Jose recommends reviewing its ADU Universal Checklist before investing in detailed plans.

When reviewing additional dwelling unit floor plans, we check the everyday clearances. The refrigerator needs room to open. A laundry closet needs space for connections. The bedroom needs somewhere to put a dresser after the bed goes in.

ADU construction cost depends on those decisions and on the work outside the unit. Trenching, foundation conditions, utility upgrades, and site access can change the budget considerably.

We would not give you a firm additional dwelling unit cost from a rendering alone. Our estimate separates the major work areas and identifies allowances or conditions that still need investigation. You should be able to see what the price covers.

Preapproved plans may simplify part of the process, but San Jose still requires site-specific documents and review. A preapproved design does not automatically approve its placement on your property.

From drawings to handover

As your ADU construction contractor, ZySe Construction can coordinate planning, construction, and the finished interior. Our ADU design-build scope brings the drawings and building work together, with the required design professionals involved for the project.

For a new structure, work can include site preparation, foundations, framing, roofing, windows, and exterior finishes. We coordinate plumbing, electrical, heating, and ventilation before insulation and drywall close the walls.

Inside, we complete the kitchen, bathroom, waterproofing, tile, flooring, paint, and trim. Small units get crowded quickly when several trades need the same room. Scheduling matters when the plumber needs access where the cabinet installer is about to work.

When comparing ADU builders, ask who handles those handoffs, permit coordination, and inspections. San Jose requires inspections during construction and final approval before the unit is ready for occupancy.

Our project manager tracks the remaining adjustments through the punch list and final cleaning. That includes the small items: a door rubbing, a paint touchup, or a cabinet drawer needing another adjustment.

If you are considering an ADU in San Jose or the Bay Area, request a free estimate. Send the property address and tell us who will use the space. We can review the practical options and explain what needs checking before the design moves forward.

kitchen remodeling After pr1

Kitchen remodeling San Jose

Rough start
Electrical layout
Hood and venting
Cabinets and island
Backsplash and tops
Flooring and finish

Rough start

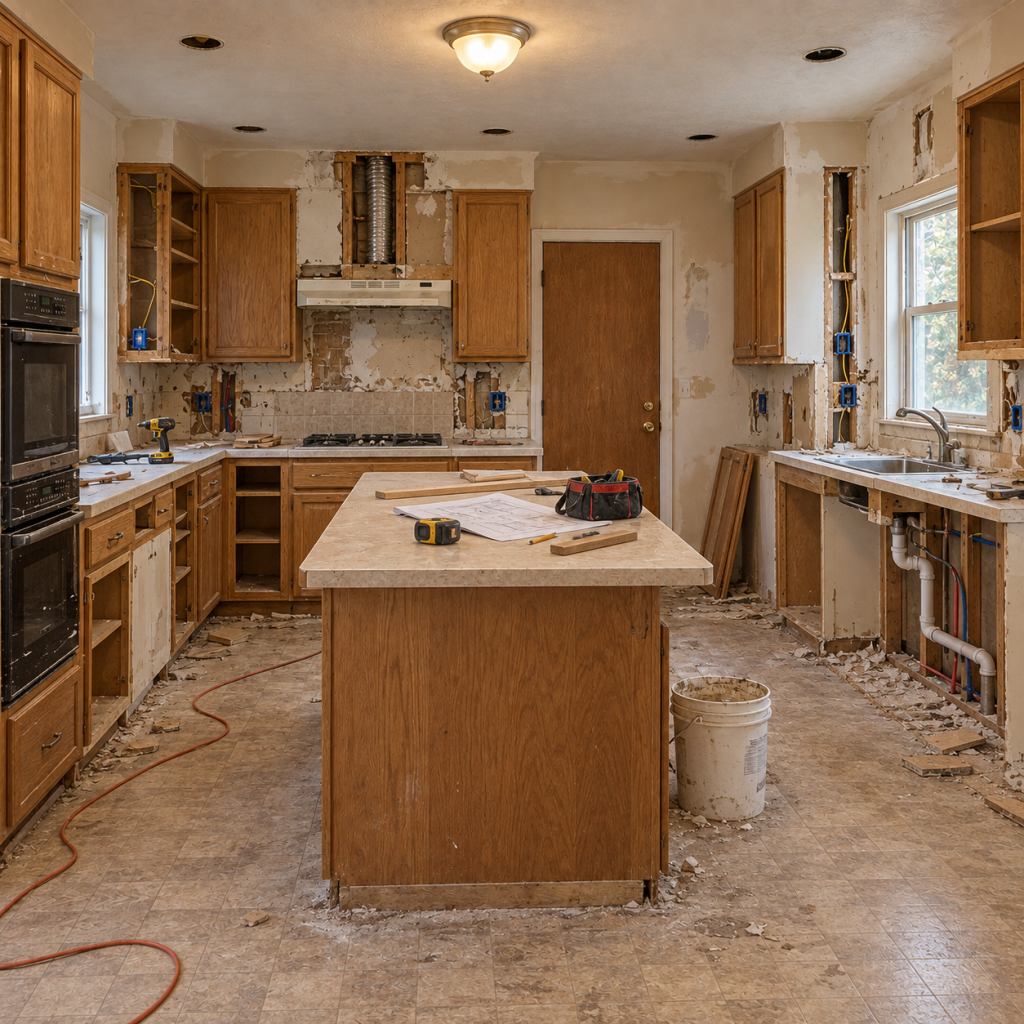
We started this kitchen remodeling job by taking out what was left of the old kitchen. The island came down almost completely. Inside it were the sink drain, water lines, wiring, old blocking, and very little room to work.

The refrigerator stayed plugged in during the first part of the job. We covered it with plastic, pulled it forward when somebody needed the wall, then pushed it back again. After a few days, everybody was tired of moving it. It was always exactly where somebody needed to stand.
I checked the island measurments against the cabinet plan several times because the drain looked wrong from one side. From the front, it seemed fine. Once I measured from the partition line, it was too close. We moved it before the cabinet base went in.
Some drywall looked solid until we touched it. A few edges broke away immediately, so we cut those sections back. We added fresh backing behind the cabinet areas while the walls were still open.

Electrical layout

The old kitchen left electrical boxes in places that no longer worked. A couple of runs were dead. Others went to outlets that was being removed. We traced everything with a Klein tester and marked the circuits before pulling anything out.

The new layout needed power for the dishwasher, microwave, hood, countertop outlets, and island. Fairly normal work. The ceiling was the annoying part.

It slopes across the room while the island runs straight underneath it. Following the old holes would have shifted the pendant and recessed lights away from the cabinets. We marked the island, shot the line with a Bosch laser, and worked upward.

One existing hole landed too close to the new pendant position. We patched it and made another cut. It added drywall work, but leaving it there would of bothered me every time I walked into the room.

I saw almost the same thing on a Campbell job. The cabinet plan changed late, but nobody moved the coffee outlet. The machine ended up sitting about six inches away. It worked, technically, but looked stupid.

Hood and venting

kitchen remodeling before pr1

The hood was easier to handle while the wall and part of the ceiling were open. We marked the range center and held the hood body in place before closing anything.

The drywall crew was already there that morning. They wanted to close the ceiling, so we asked them to leave that section alone. Then the cabinet installer needed the final hood width before setting the upper boxes. A few phone calls followed.

On the first dry fit, the hood sat slightly off center. It was a small difference, but the cabinets would have made it obvious. The duct had enough movement, so we reset the connection and checked it again.

When the cabinets arrived, the hood fit between them without cutting either finished side panel.

Cabinets and island

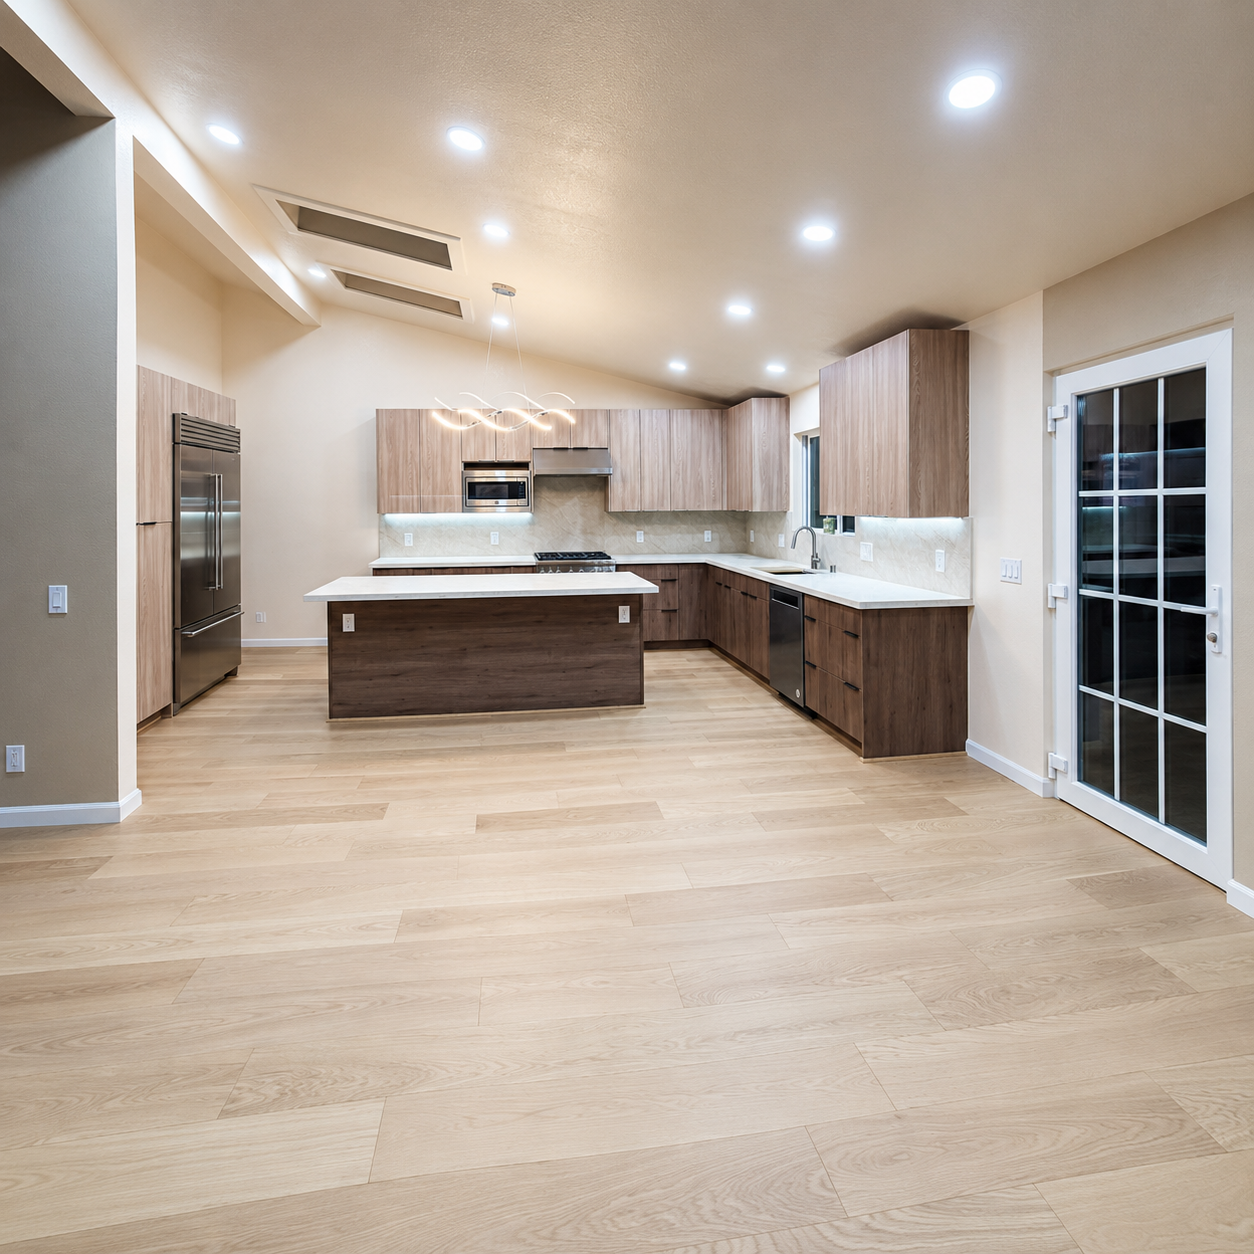
We installed light slab-front cabinets on top and darker cabinets below. The island matched the lower run. Tall panels closed the gaps around the refrigerator, so it stopped looking like an appliance pushed into an empty corner.

The walls created more work than the cabinet boxes. One corner was far enough out that the first cabinet looked fine, and so did the second. By the third box, the door gaps started showing the problem.

We shimmed the first cabinet again, pulled the filler, scribed it, and put everything back. Then part of the run came down one more time.

That corner used most of an afternoon.

The island had its own issue. One water line came up too close to the rear panel. Cutting around it would always been visible whenever the cabinet was opened. The plumber shifted the support and moved the line slightly.

About an hour of work. Better than leaving a bad cut inside a new cabinet.

Older San Jose homes are like this sometimes. You measure one wall at three different heights and get three different numbers. We use the drawing for the layout, but we still build to the wall that is actually there.

By this stage, the kitchen remodeling job finally looked like a kitchen again. Before that, it was framing, open boxes, wires, dust, and somebody asking where the pencil went. Usually while holding it.

Backsplash and tops

The countertop company came after the cabinet boxes were fixed in their final positions. We checked the sink cutout, range opening, wall returns, and island overhang while they templated.

The tops are a light quartz-style material with a simple edge. We did not add anything decorative there. The cabinet colors and backsplash already gave the room enough detail.

The backsplash pieces were fairly large, so small wall problems showed up quickly. One outlet box stood proud of the wall. The first piece would not sit flat over it.

I stopped the installer before he cut around the box. We reset it, checked the piece again, and it sat flat. Otherwise, the outlet cover would have rocked every time somebody touched it.

The pieces around the range were dry-fitted first. We used a neutral Mapei joint color. Nobody spent twenty minutes discussing grout. We chose the one that disappeared best and kept working.

Flooring and finish

The floor looked ready from across the room. It was not.

After demolition, adhesive ridges remained in several places. We also found low spots near the island. We scraped the high areas, filled the dips, and checked everything with a long straightedge.

There was alot of dust during that part, even with the vacuum beside the grinder. By lunch, the vacuum hose was probably cleaner than any of us.

We ran the light oak planks toward the kitchen and continued them through the open room. A few rows started creeping near the island. We caught it early, pulled them back, and reset them. Annoying, but still small.

After the flooring came the punch list. One drawer rubbed after the countertop went in. Two cabinet doors needed another hinge adjustment. The silicone behind the sink looked fine from eye level, but the under-cabinet light caught an uneven section. I cut it out and ran it again.

We tested the outlets, faucet, drain, hood, and lights before cleanup. The dishwasher opening got measured one more time. Our project manager kept the remaining items on one sheet: two paint touchups, one cabinet adjustment, and some caulk.

If you are planning kitchen remodeling in San Jose or the Bay Area, have the room measured before the cabinet order goes in. Keep the appliance specifications nearby too. Call us before ordering, and we can go through the room and the drawings with you.

bathroom remodeling san jose after pr-1

Bathroom remodeling Sunnyvale

Room opened up
Plumbing reset
Shower rebuilt
Tile and vanity
Light and air
Four-week handover

Room opened up

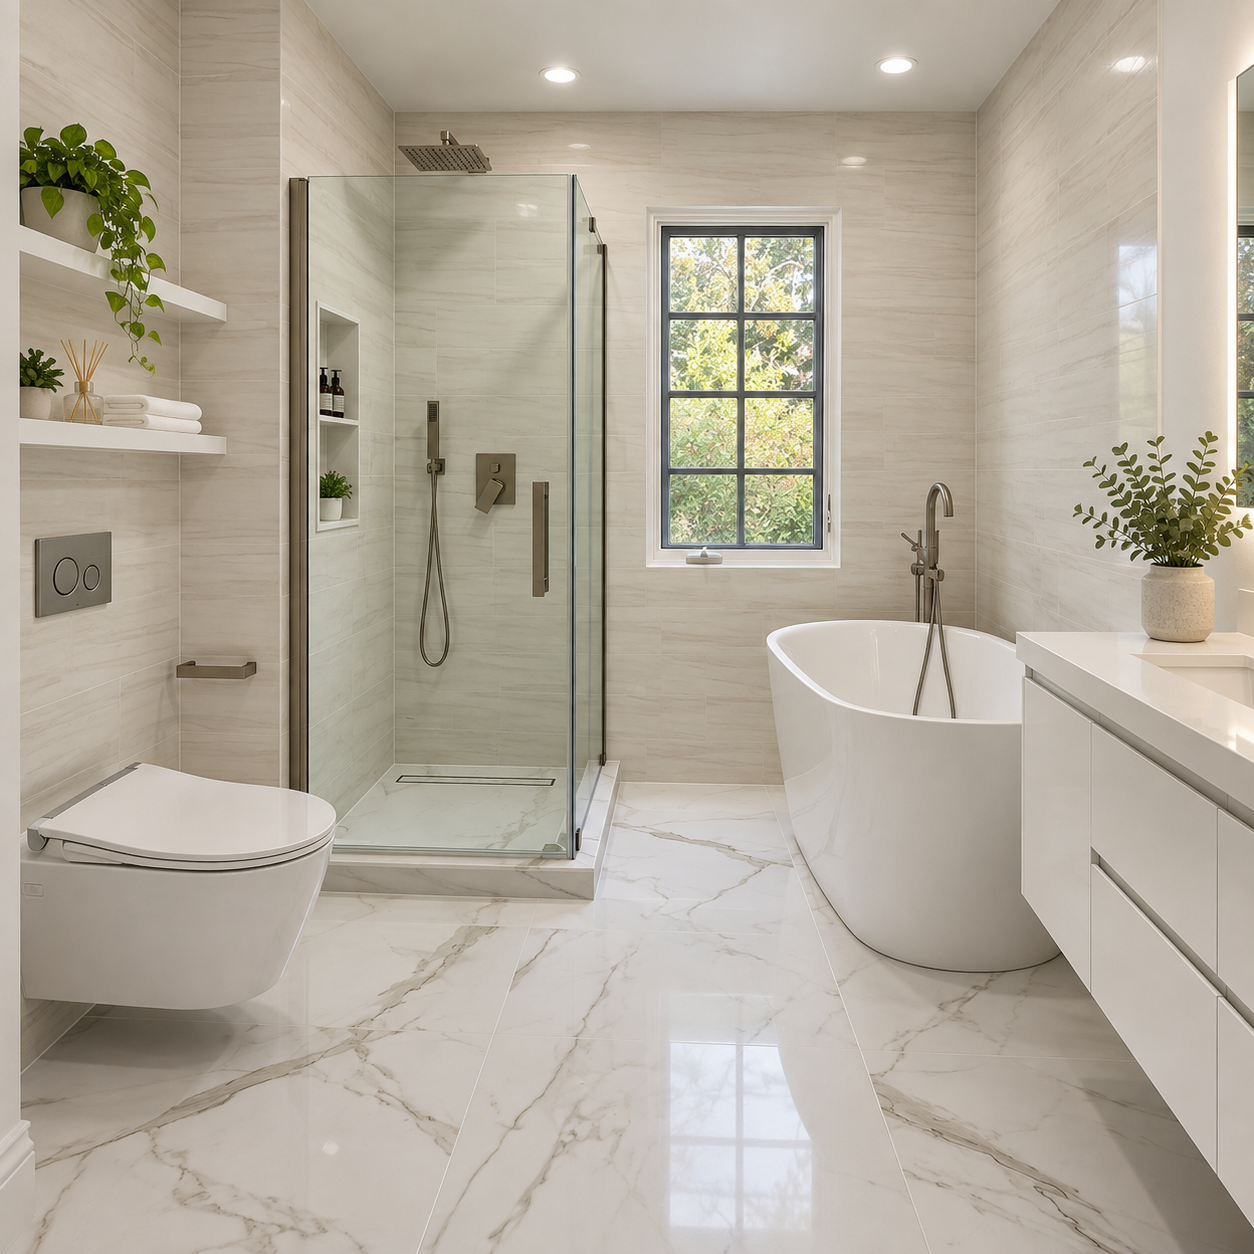
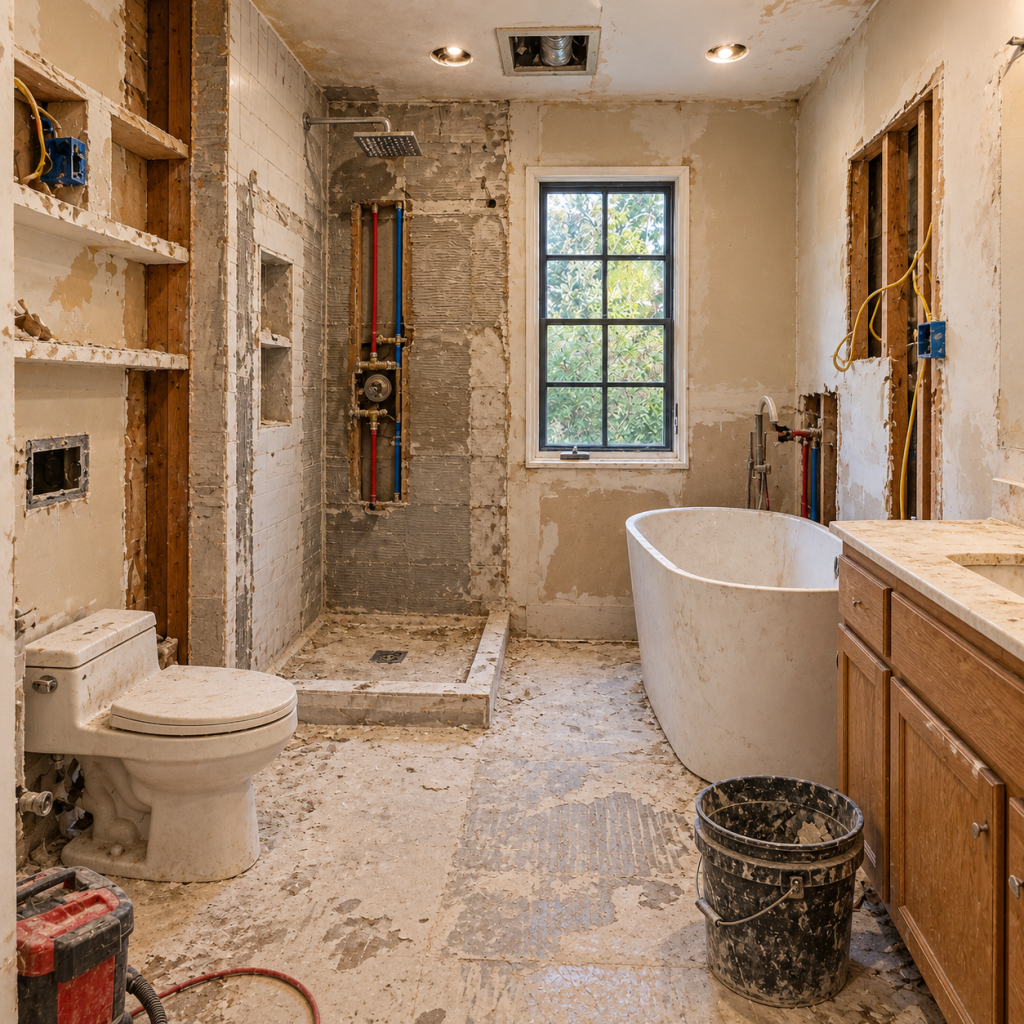
We came into this Sunnyvale project after demolition had already exposed most of the room. The old wall tile was partly gone, the shower base was open, and several stud bays showed wiring and water lines. This was a full bathroom remodeling job, planned for four weeks with a $12,000–$22,000 budget range.

bathroom remodeling san jose before pr-1

The layout had enough floor area, so pushing walls around made little sense. The real trouble sat inside them. The toilet, tub, shower, and vanity all competed for a cleaner path through the room. The old vanity drawers was shallow, yet the cabinet still took up a heavy block along the right wall.

People comparing remodeling bathroom contractors often start with tile and fixtures. I start by looking at what demolition uncovered. Here, that meant old plumbing, rough openings, and a shower layout that needed sorting before anybody closed the walls.

Plumbing reset

We opened the wet wall farther and traced the supplies serving the shower, tub, toilet, and vanity. A few lines ran where the new controls needed backing. The plumber shifted those runs, reset the rough-ins, and left enough room for solid blocking behind the shower hardware.

The toilet changed to a wall-hung setup with the tank hidden in the wall. That work had to happen early because the carrier, waste connection, and finished wall plane all depend on each other. We dry-fitted the frame, checked the bowl height, then checked it again after the wall build-up was marked.

The plumber kept his notbook on the old vanity top. It vanished for half an hour and turned up under a folded drop cloth. Fairly normal morning.

Once the rough plumbing held where it belonged, we ran the tub filler and vanity connections into their final positions. We tested the lines before the backer went up. That kept the tile crew from waiting on a correction later.

Shower rebuilt

The shower needed the most coordination. We rebuilt the base for a straighter glass line, set a linear drain, and worked the floor pitch toward it. The niche was framed around the plumbing instead of being squeezed into whatever space remained.

During bathroom remodeling, one trade can easily pin the next trade against a bad decision. Our tile setter wanted the niche centered on the wall. The plumbing sat slightly into that space, so the plumber moved the obstruction before waterproofing. He lost some time; the finished niche landed where it should.

We installed the waterproofing through the shower floor, curb, corners, and niche. Every change of plane received another look before porcelain covered it. The enclosure opening was measured from the finished tile build-up, not from bare framing.

Tile and vanity

Large porcelain pieces went across the floor and continued up the bathroom walls. That reduced the number of grout joints, although it made the layout less forgiving. We dry-laid the first floor run from the shower and window lines. Two porcelain pieces was pulled back after the joint began drifting near the tub.

The tub stayed freestanding, with enough space around the edge for cleaning and access to the filler. Near the shower, one cut looked acceptable from the doorway but crowded the glass channel. We cut another piece. About twenty minutes, plus the usual search for the pencil that had just been in my hand.

The custom vanity changed the right side of the room more than expected. Its floating installation opened the floor below and gave the walkway a lighter feel. We set the cabinet level, checked the drawer clearance, then templated the top. Lists of bath remodeling companies may group that as “vanity installation.” On site, it is cabinet blocking, plumbing position, wall flatness, and a few small adjustments.

Light and air

We replaced the uneven work lighting with recessed ceiling lights and added task lighting at the mirror. The old ceiling opening also gave us access to improve the ventilation path. We checked the exhaust pull before closing the ceiling, because a quiet fan is useless when the duct connection is poor.

The window stayed central to the room, so we kept the tile courses balanced around it. One edge needed a small trim adjustment after the wall was flattened. Nobody noticed the correction afterward, which was the point.

Four-week handover

By the final week of bathroom remodeling, the glass enclosure, wall-hung toilet, tub, vanity, and trim were in place. We adjusted the shower door, checked the drain flow, ran every fixture, and tested the fan and lights. The last touchups was written on one sheet instead of being passed around in text messages.

The first silicone pass beside the vanity caught the mirror light and looked wavy. I cut that section out and ran it again. Final cleaup also took longer around the glass channel, where tile dust likes to hide.

If your search notes still say “bathroom upgrades near me,” bring the contractor the room dimensions and fixture specifications first. For a Sunnyvale remodel, we can walk the plumbing locations and shower layout before materials are ordered. That is the useful time to settle the scope.

Kitchen remodel timeline After pr-2

Kitchen remodel timeline

Opening the room

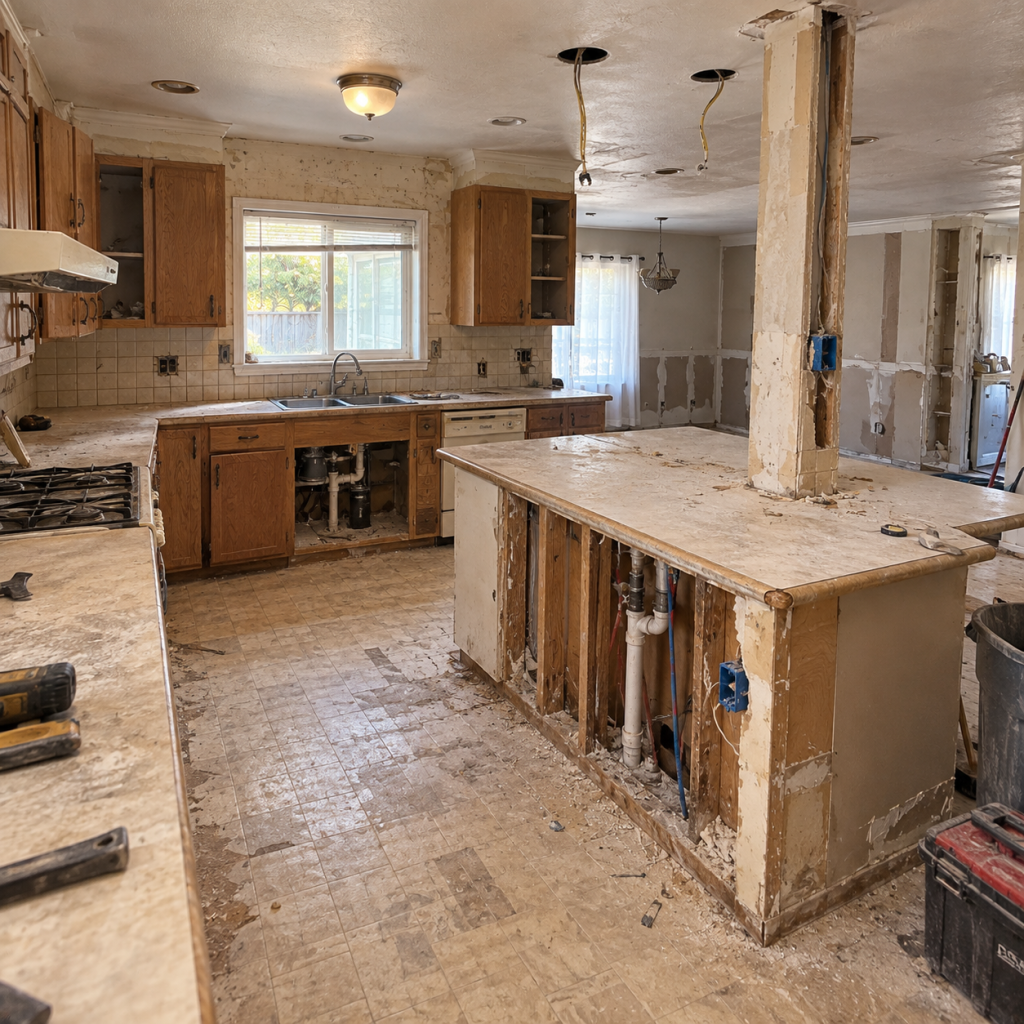
We started this kitchen remodel in San Jose by pulling the old finishes and opening the areas that needed access. The oak cabinets, worn counters, small tile backsplash, and old floor had reached the end of their run.

The wall behind the backsplash needed patched after the tile came off. Some pieces released cleanly. Others brought drywall paper and old adhesive with them. We cut those areas back instead of trying to bury the damage.

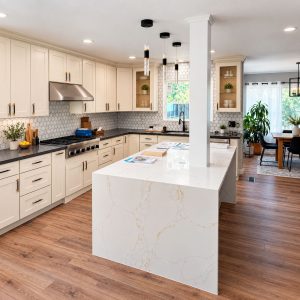
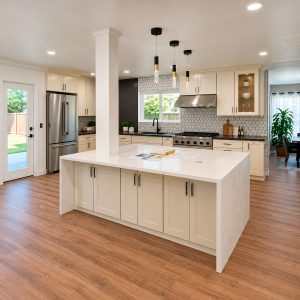
The large island was opened down to the framing. Plumbing, wiring, outlet boxes, and old blocking were packed inside. The support column stayed in place, so the new layout had to work around it. Removing it would have turned the project into a different job entirely.

Utility rough-in

Kitchen remodel timeline Before

The old boxes was left in locations that matched the previous cabinets and lighting. We traced the circuits, removed unused runs, and reset the electrical points for the new layout. Ceiling openings were also prepared for recessed lights and three pendants above the island.

Under the sink, we cleaned up the exposed plumbing and prepared the connections for the new single-bowl sink, faucet, and dishwasher position. The island utilities needed more attention becuase the new design included a built-in oven.

Cabinet drawings stayed nearby during rough-in. One misplaced box can land behind a drawer or appliance panel. We checked the clearence before the walls and island frame were closed.

Island rebuild

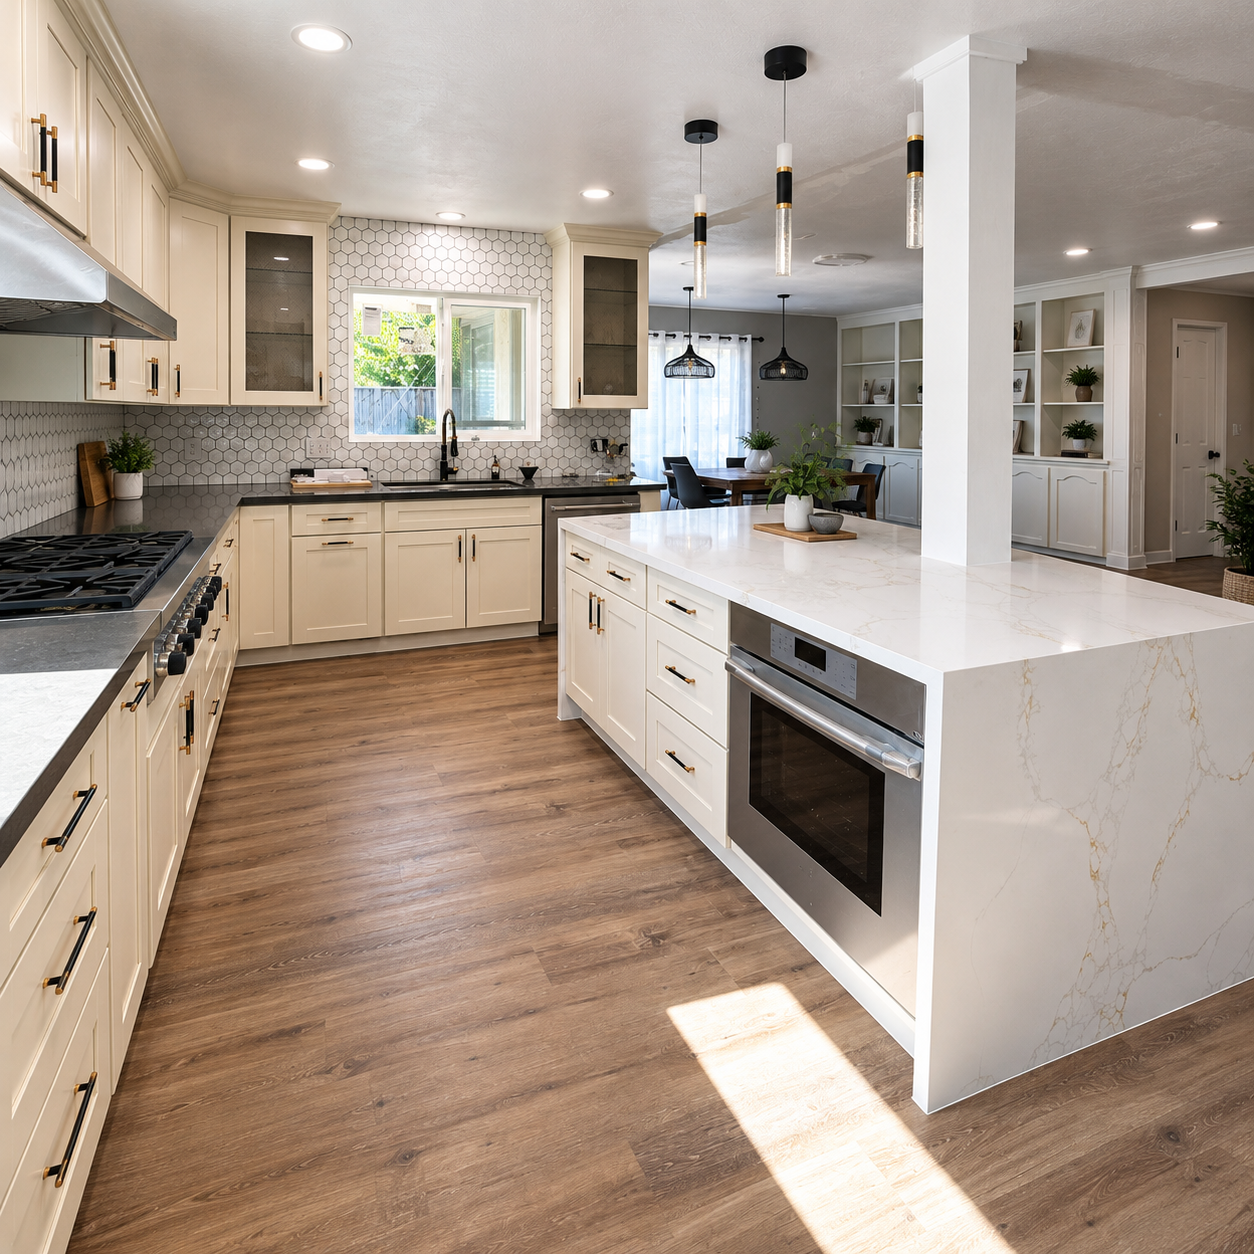
The old island had a rounded counter, exposed framing, and a column rising through one side. We rebuilt it as a larger rectangular work area with storage and a built-in oven.

The support column was squared, repaired, and wrapped in white trim. It now looks connected to the island instead of standing beside it like an unfinished post.

During the first dry fit, the oven opening and electrical location needed another check. The appliance fit, but the cable had very little room behind it. We moved the connection before the finished panels went on.

A few phone calls followed.

The island panels was installed only after the appliance dimensions were confirmed. A white veined slab was then fitted across the top and carried down the visible end as a waterfall panel.

Cabinets and storage

Kitchen remodel contractor San Jose

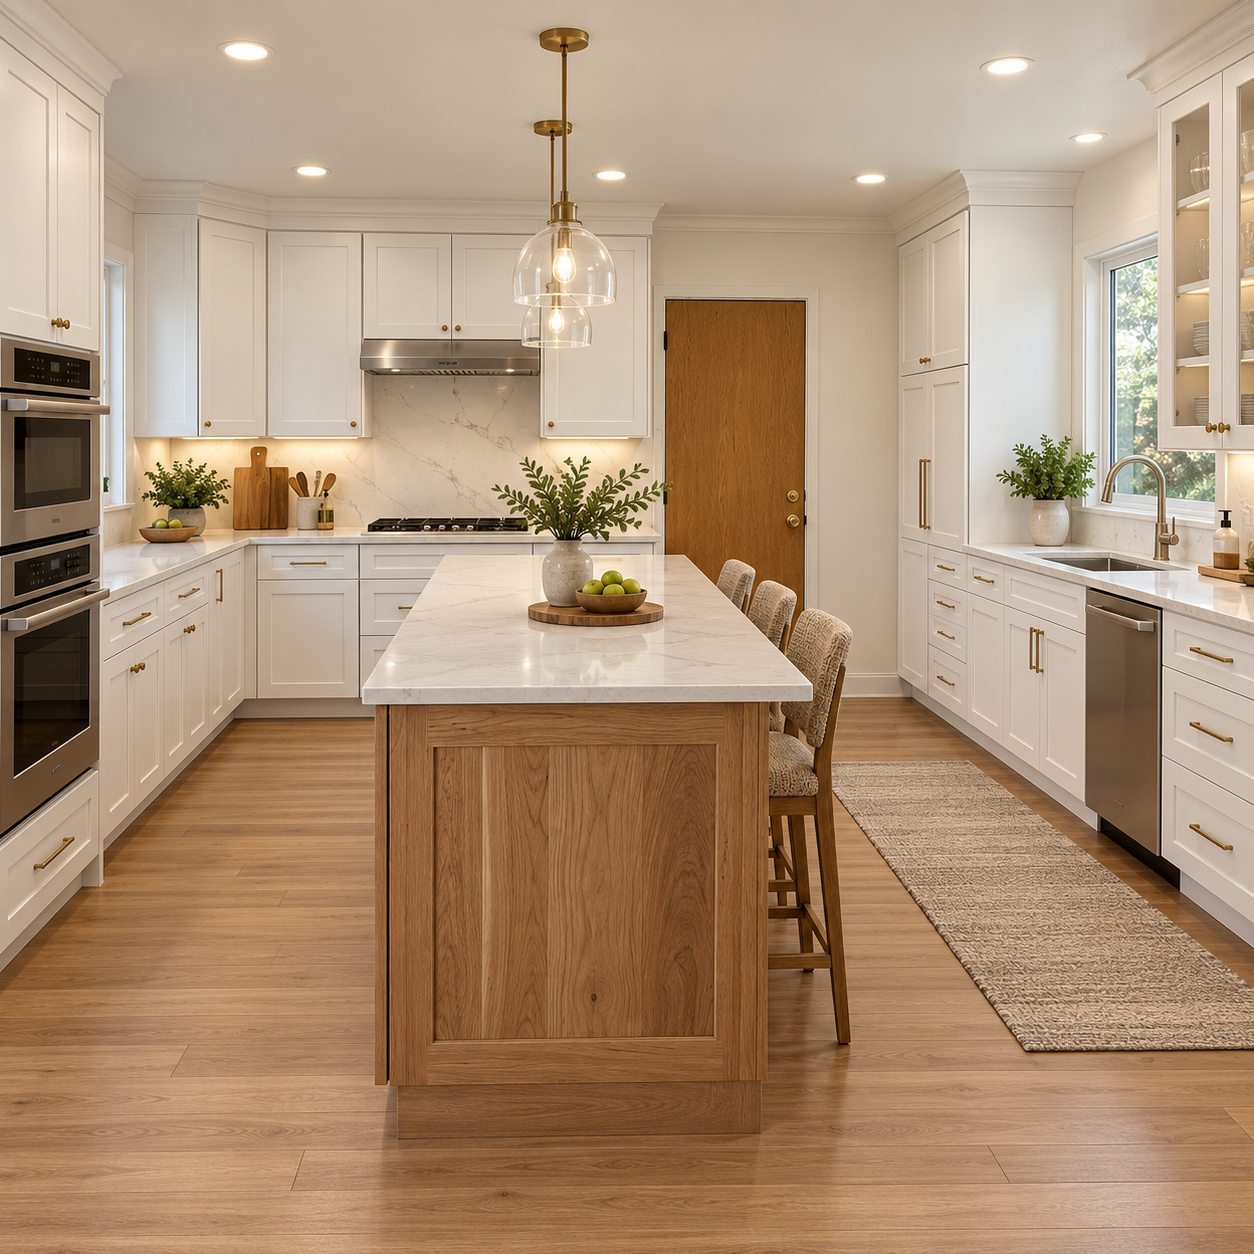
For this custom kitchen remodeling in San Jose, we replaced the old oak boxes with warm white Shaker-style cabinetry. Dark handles with brass details added contrast without making the room busy.

The upper cabinets now reach the ceiling and finish with crown molding. Around the window, glass-front cabinets balance both sides of the sink. Getting those reveals even took longer than expected. The window was square enough; the surrounding wall was less cooperative.

We also added drawers and storage to the island. In the adjoining room, the unfinished wall became a built-in cabinet and shelving unit. That work was tied into the same trim and paint package so the kitchen and dining area read as one space.

Surfaces and lighting

The perimeter received a dark countertop, while the island stayed light. That difference helped separate the main work run from the larger prep and seating area.

We installed a white hexagon backsplash around the range, sink, window, and upper cabinets. The cuts around outlets took time. One box sat slightly proud, and the first piece would not lie flat. We reset the box and tried it again.

The old ceiling fixtures were replaced with recessed lighting and slim pendant lights over the island. Two darker pendants went into the dining area. We checked the aligment from the kitchen entrance because that is where a shifted row shows up first.

The range hood, cooktop, dishwasher, built-in oven, sink, and faucet were fitted after the surrounding surfaces were ready. The protective film stayed on longer than anyone liked, but it saved the stainless during the last round of work.

Flooring and handover

Kitchen remodel cost San Jose

The old small-format floor covering came out with the demolition. Afterward, the base needed scraping and spot leveling before the new planks could be laid.

We ran warm wood-look flooring through the kitchen and into the adjoining room. A few rows started drifting near the island. We noticed it early, pulled them back, and reset them. Annoying, but still small.

The last stage included baseboards, drywall touchups, paint, cabinet adjustments, caulking, and hardware checks. One door needed another hinge adjustment after the counters went in. The backsplash also needed a small silicone correction near the sink.

Before cleanup, we tested the outlets, lighting, faucet, drain, hood, and appliance openings. Dust was removed from the cabinets, counters, floor, and adjoining built-ins before handover.

Before ordering cabinets, have the room measured and keep every appliance specification ready. A kitchen contractor in San Jose should check the existing plumbing and electrical during the same visit. We can review the room and cabinet plan before the order is placed.

bathroom remodel contractor san jose after pr-2

Bathroom remodel timeline

Week one access
Rough work week
Building the shower
Porcelain set
Glass came later
Last week checks

Week one access

The owner found us while searching “bathroom renovations near me.” The next message was more useful: remove the outdated tub area and build an easier walk-in shower. We had four weeks and a $14,000–$24,000 working range.


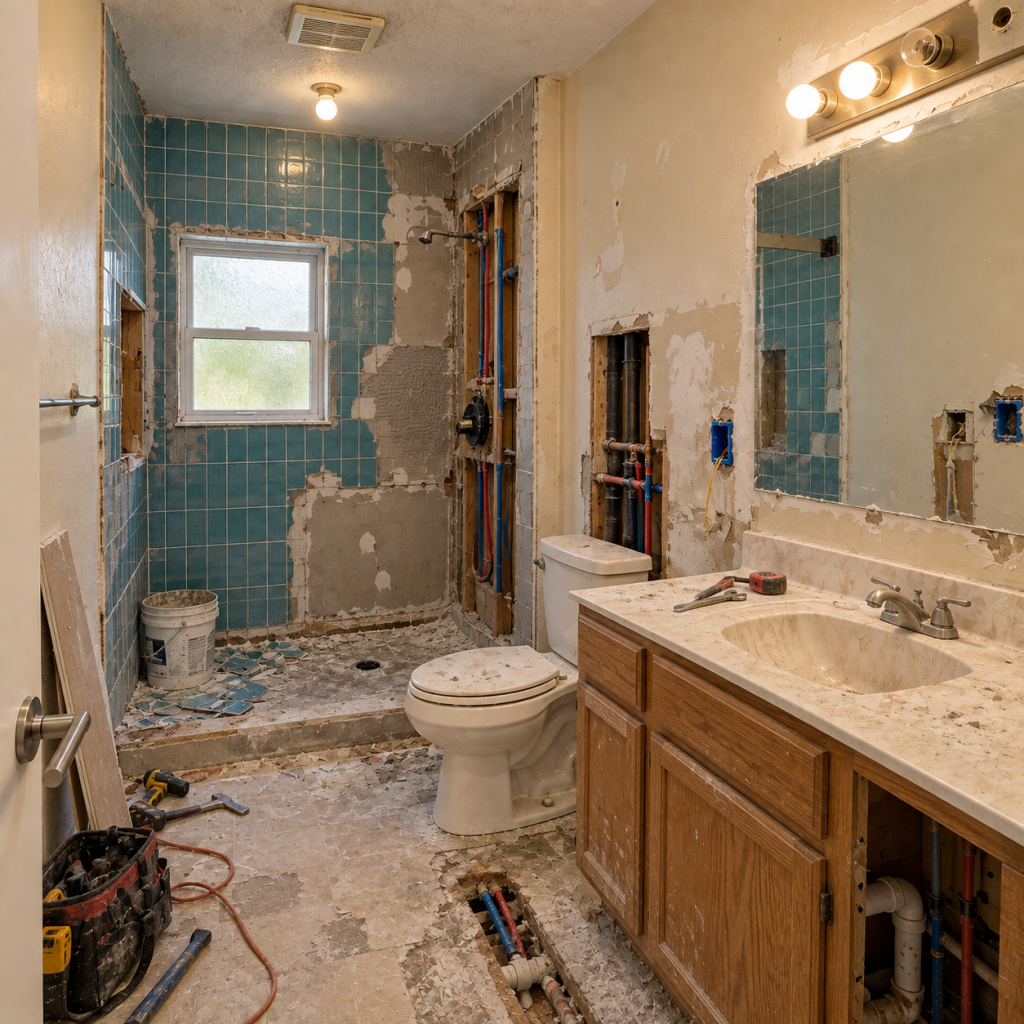
Part of the bathing area was already stripped when the progress work began. The old blue tile and backing was still hanging on several walls. We removed the loose sections and opened the plumbing side far enough to reach the supply lines.

The toilet and old vanity remained during early demolition. That left one narrow lane for tools, buckets, broken tile, and anybody heading toward the shower. The tool bag lived beside the door for most of that week.

A one day bathroom remodel was never realistic here. The shower base, plumbing, waterproofing, porcelain, and glass all depended on separate stages.

Rough work week

We used the open wall to set the overhead shower, hand-shower connection, and new controls. The existing water lines were accessible from the right side of the wet wall. We cleaned up the run before closing it.

The vanity plumbing was also exposed through the wall and floor. Its drain and supply locations had to match the new cabinet and sink. The old cabinet still gave us a useful reference point.

Two open electrical boxes was sitting around the mirror wall. We confirmed the switch and new light positions before patching. The old cieling light and exhaust area needed finish work later.

The owner had compared bathroom remodel contractors near me and expected the rough stage to take only a few days. Once everything was open, the trade overlap became obvious. Plumbing needed access before the wall and tile crews could move forward.

Usually not the best-looking week.

Building the shower

Bathroom renovations near me

We rebuilt the shower base where the old tub area had been. The new entry stayed lower and cleaner, without putting another tall edge between the bathroom and shower floor.

The pan needed an even pitch toward the drain. We checked it before waterproofing, then worked through the corners, threshold, window wall, and plumbing penetrations. The custom niche went into the left wall.

Its position depended on the framing and planned tile courses. Setting it wherever an empty stud bay appeared would have left awkward cuts around the opening.

The tile installer was ready for wall preparation while one plumbing section was still open. He moved to the floor layout until the plumber finished. Nobody stood around, although the shower wall waited.

Porcelain set

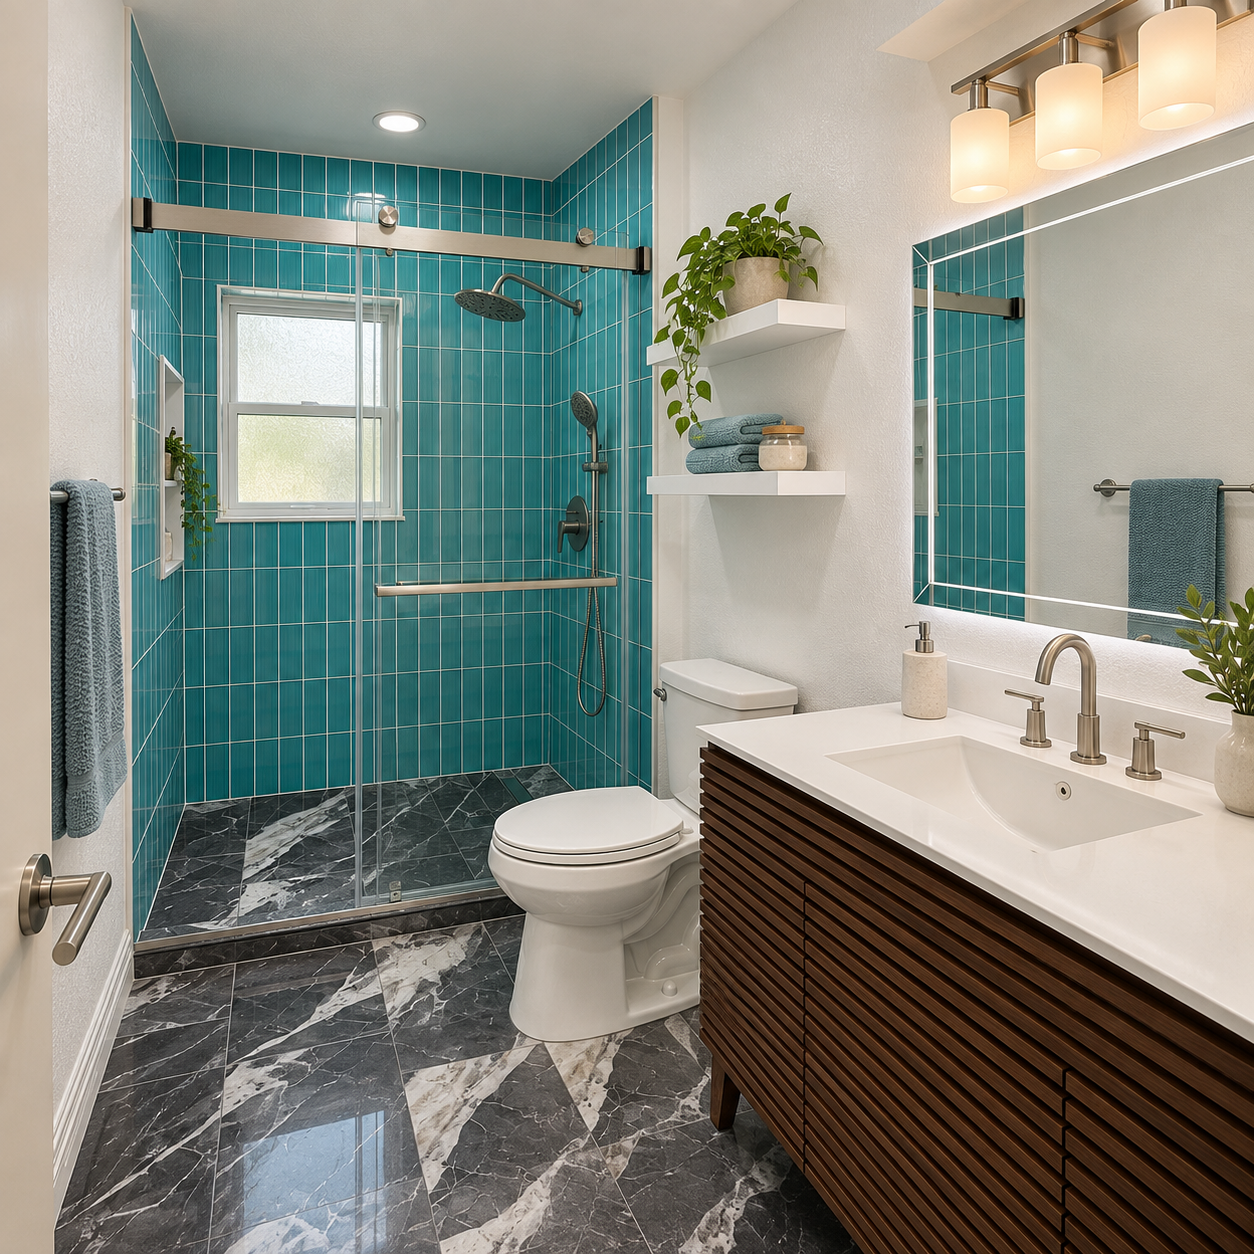
The shower walls received vertical teal porcelain. Dark marble-look porcelain went across the main floor and continued into the shower. The two finishes shared the room without trying to match each other.

We centered the back-wall layout around the widnow and carried the vertical joints into both corners. Narrow tile makes a drifting grout line easy to spot. The niche and fixture cuts also had to sit inside that grid.

The dark floor took more sorting than expected. Several pieces placed too much white veining directly in front of the vanity. We moved them toward the shower and mixed the floor run again.

Homeowners researching bathroom renovations near me often ask when tile starts. The honest answer depends on what we find after demolition. On this job, the plumbing and shower base had to be settled first.

Glass came later

The sliding glass could not be ordered from the open framing. Its measurements came from the finished porcelain, completed threshold, and actual wall faces.

That pushed glass toward the end of the schedule. While it was being prepared, we installed the dark slatted vanity, white countertop, faucet, mirror, and new lighting. The toilet returned after the floor work.

The shower received a rain head, hand shower, dark controls, and a long horizontal handle. Matte hardware sat well against the glossy teal tile.

The shelves above the toilet was installed after painting. Putting them up earlier would have made the short wall slower to finish.

People use quick bathroom remodel to mean different things. Setting finished fixtures may move quickly. Waiting for waterproofing, tile, grout, glass measurements, and fabrication is the part nobody sees in that phrase.

Last week checks

During week four, we set the glass enclosure, installed accessories, and finished the punch work. The sliding panels needed a small adjustment after the first fit. We checked the stops again before removing the protective film.

Both shower outlets were run separately. We watched the pan drain, checked the sealant joints, and tested the vanity plumbing. Lighting, switches, exhaust, and the toilet went through the same final pass.

After four weeks, the room still had its original footprint. The tub edge was gone, access was easier, and the glass kept the shower from feeling boxed in.

If you are comparing bathroom renovations near me, ask when the glass gets measured and what must finish before that visit. For a Santa Clara tub-to-shower project, those dependencies decide whether the proposed timeline is believable.

Kitchen remodel cost San Jose After pr-3

Kitchen remodel cost San Jose

Budget before demolition
Same footprint
Open-wall work
Cabinets and surfaces
Six-week handover

Budget before demolition

Kitchen remodel cost San Jose Before pr-3

We took the first progress shot after demolition had already started. Parts of the backsplash were gone, several cabinet sections were open, and the sink plumbing was exposed. We had a $25,000 contract amount and six weeks on the schedule. That figure covered removal, rough adjustments, shaker cabinets, quartz counters, porcelain backsplash, flooring, lighting, finish work, and cleanup.

When a homeowner sends “kitchen remodel cost san jose” in the first message, I start with the footprint. Moving a sink, range, doorway, or major electrical feed changes the job quickly. Here, the expensive moves were avoidable.

People ask about the average kitchen remodel cost while I am still looking at the first room photo. I can give a range, sure. For this kitchen, I needed to know whether the cabinets cleared the window trim and where the hood duct landed. That came before the price was useful.

Same footprint

The lead came in under “kitchen remodeling san jose ca,” followed by the useful part: improve storage and workflow without enlarging the room. We kept the sink below the right window, the cooktop on the back wall, and the oven stack on the left. The back door stayed where it was.

Storage improved through the cabinet plan. The new perimeter run uses more drawers, full-height pantry storage, and upper cabinets carried to the crown. We lengthened the island and added seating while keeping the working aisle open toward the sink.

Before fixing the island boxes, we stood them in place and walked the route from ovens to sink. The line on the drawing felt fine. The actual aisle was tighter once the doors and overhang were considered, so we shifted the boxes before fastening them.

Fairly normal adjustment. Much cheaper at that stage.

Open-wall work

Removing the old backsplash gave us working access around the electrical boxes. Two boxes was sitting proud of the wall plane, which would have pushed the porcelain out. We reset those locations before the wall was closed and left the remaining circuits where the new cabinet plan could use them.

The old hood duct was already visible above the range. We checked its center against the cooktop and upper cabinet opening before hanging anything. The new hood stayed on that cooking wall, so we did not need a longer duct route.

Lighting took a separate layout. The old ceiling had scattered openings and one central fixture. We marked the island first, set the pendant positions from its centerline, then filled the room with recessed light.

One pencil disappeared during that work and turned up behind the level. Nobody admitted putting it there.

Cabinets and surfaces

White shaker cabinets went around the perimeter. We used a warm wood finish on the island, which kept the center from looking like another white box. The tall pantry section also closed the loose space beside the refrigerator opening.

The drawer banks was the part that changed daily use most. Pots moved into deep drawers near the cooktop, and the sink base kept its plumbing access. One cabniet needed to come back off because its filler pinched against the window-side run. We trimmed the filler, reset the box, and checked the reveal again.

Quartz templating waited until the base cabinets and island were fixed. The fabricator checked the sink cutout, range opening, seams, and seating overhang. After the tops went in, we installed the porcelain backsplash and cut around the finished outlet positions.

Clients sometimes bring up “best kitchen remodeling companies” during an estimate. I ask them to put the scopes beside each other. One price may include countertops and cleanup. Another leaves both as allowances, usually somewhere near the bottom of the page.

Six-week handover

The last week was mostly fitting and correction. We adjusted the doors, set the hardware, finished the crown, and checked the appliance openings. Under-cabinet light showed one uneven backsplash joint, so that section got another pass. The finsh looked fine from the doorway; up close it needed ten more minutes.

The final items was written on one sheet: two door reveals, a drawer adjustment, paint touchups, and cleanup inside the window tracks. We tested the lights, hood, faucet, drain, and cabinet doors before handover. The room stayed inside its original footprint and gained the storage and work surface the old layout was missing.

If your search started with “best kitchen remodeling companies near me,” print the quotes and mark what each one leaves out. Keep the appliance specifications with them. Bring that stack to the site visit.