Category: Bathroom remodeling

bathroom remodeling san jose after pr-1

Bathroom remodeling Sunnyvale

Room opened up
Plumbing reset
Shower rebuilt
Tile and vanity
Light and air
Four-week handover

Room opened up

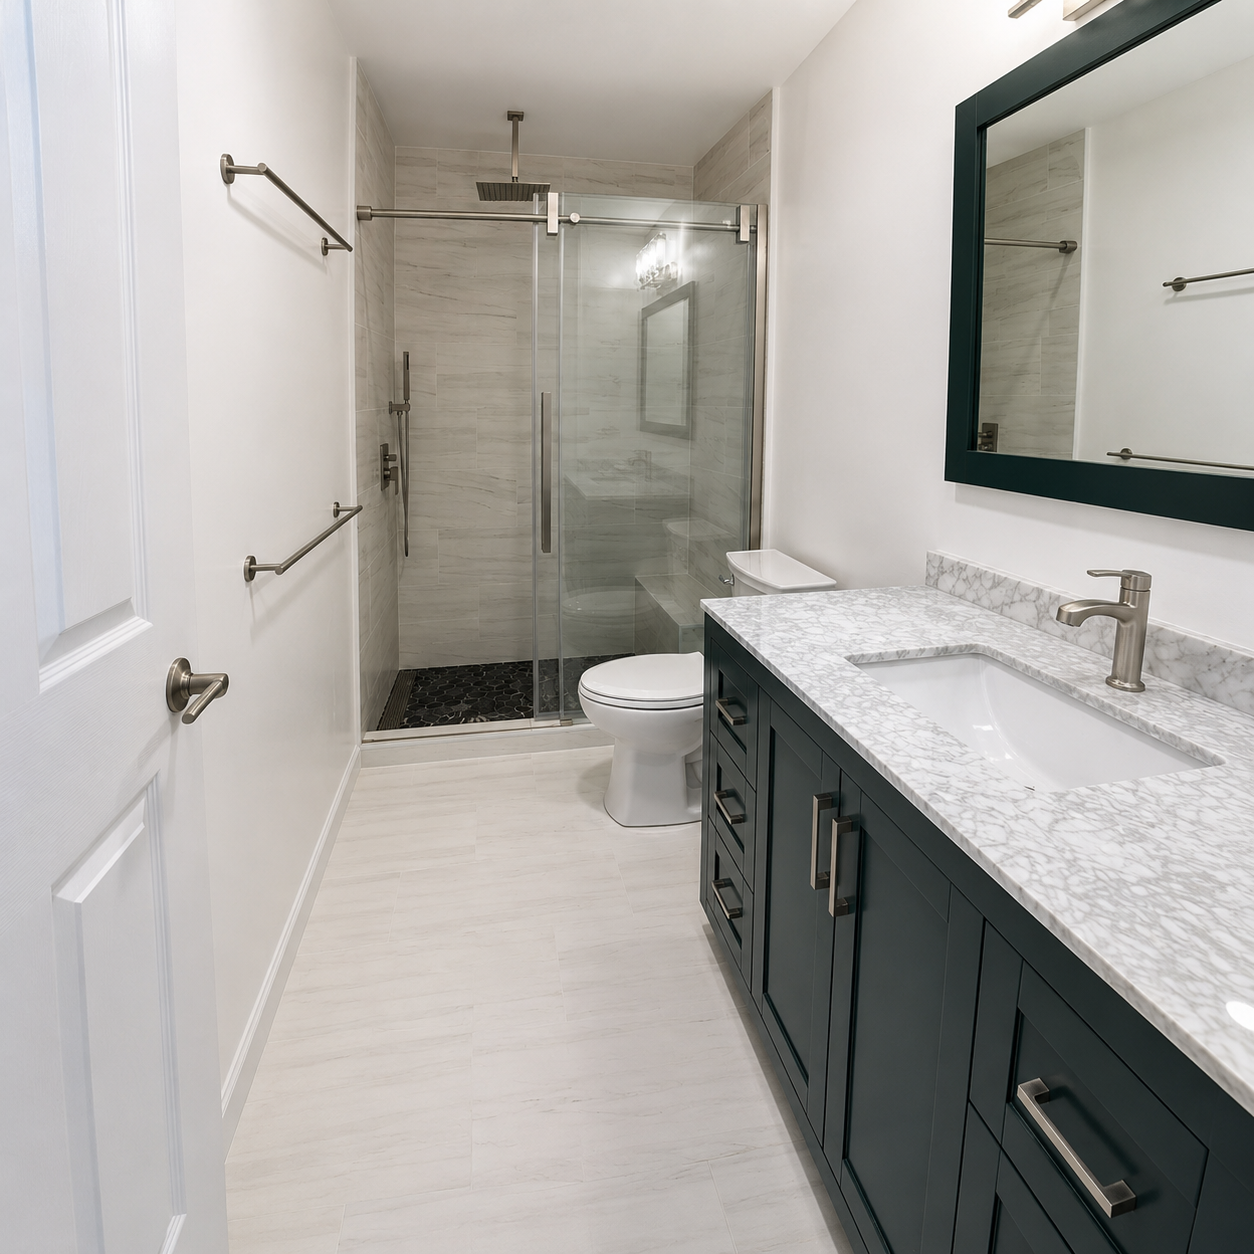
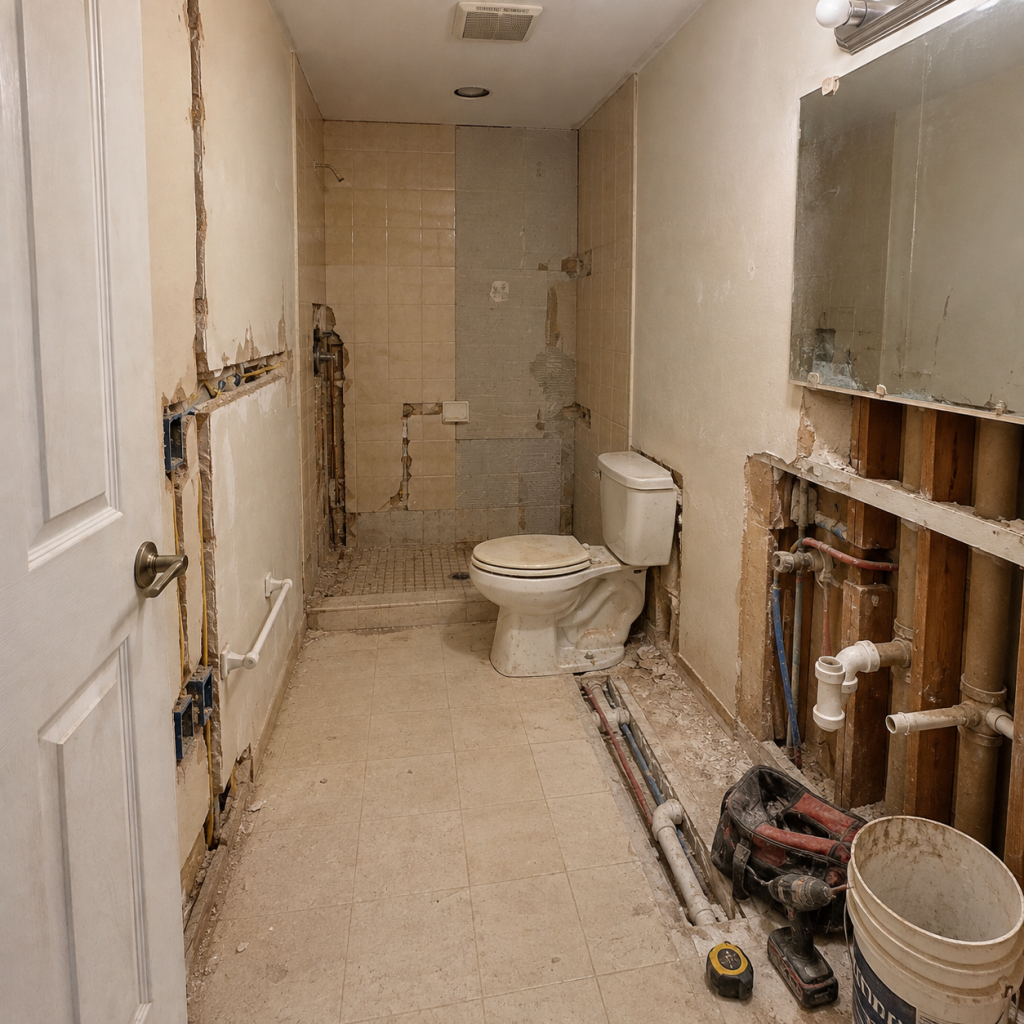
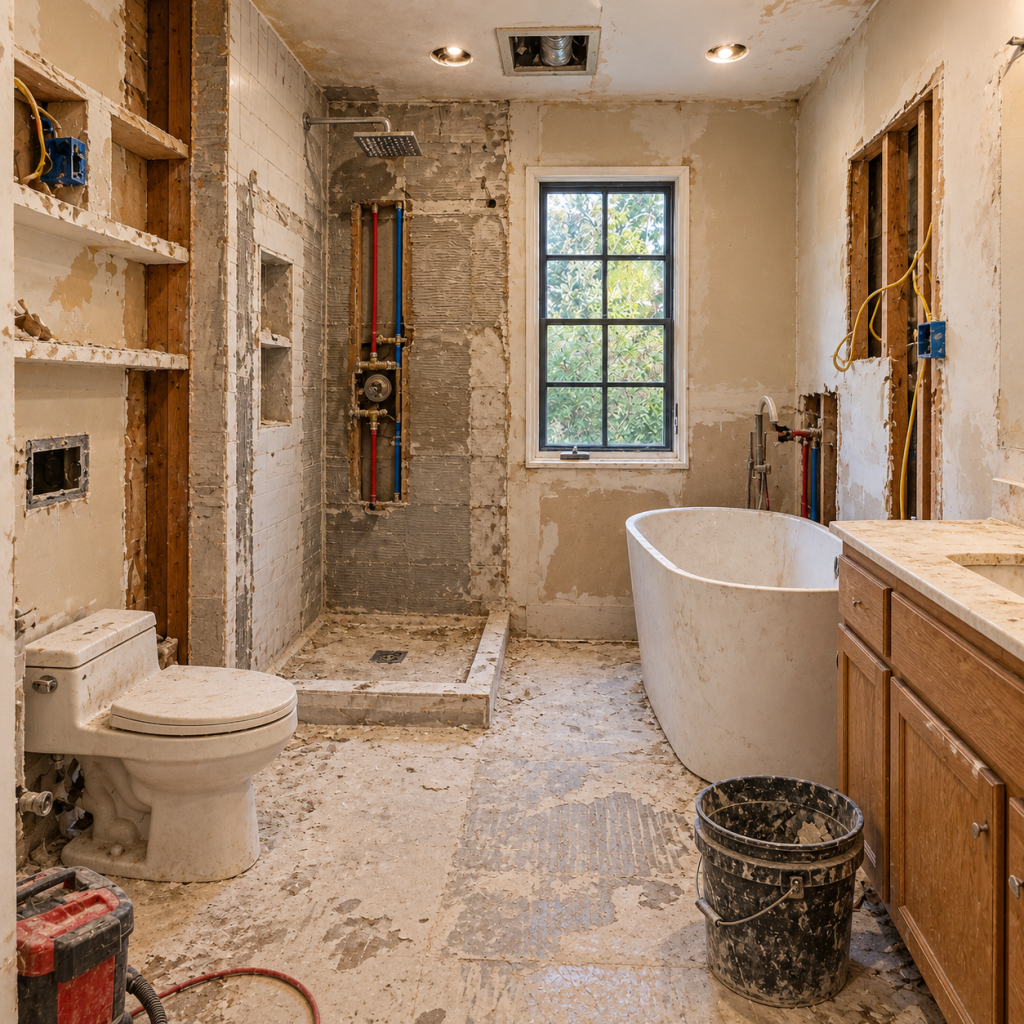
We came into this Sunnyvale project after demolition had already exposed most of the room. The old wall tile was partly gone, the shower base was open, and several stud bays showed wiring and water lines. This was a full bathroom remodeling job, planned for four weeks with a $12,000–$22,000 budget range.
bathroom remodeling san jose before pr-1

The layout had enough floor area, so pushing walls around made little sense. The real trouble sat inside them. The toilet, tub, shower, and vanity all competed for a cleaner path through the room. The old vanity drawers was shallow, yet the cabinet still took up a heavy block along the right wall.

People comparing remodeling bathroom contractors often start with tile and fixtures. I start by looking at what demolition uncovered. Here, that meant old plumbing, rough openings, and a shower layout that needed sorting before anybody closed the walls.

Plumbing reset

We opened the wet wall farther and traced the supplies serving the shower, tub, toilet, and vanity. A few lines ran where the new controls needed backing. The plumber shifted those runs, reset the rough-ins, and left enough room for solid blocking behind the shower hardware.

The toilet changed to a wall-hung setup with the tank hidden in the wall. That work had to happen early because the carrier, waste connection, and finished wall plane all depend on each other. We dry-fitted the frame, checked the bowl height, then checked it again after the wall build-up was marked.

The plumber kept his notbook on the old vanity top. It vanished for half an hour and turned up under a folded drop cloth. Fairly normal morning.

Once the rough plumbing held where it belonged, we ran the tub filler and vanity connections into their final positions. We tested the lines before the backer went up. That kept the tile crew from waiting on a correction later.

Shower rebuilt

The shower needed the most coordination. We rebuilt the base for a straighter glass line, set a linear drain, and worked the floor pitch toward it. The niche was framed around the plumbing instead of being squeezed into whatever space remained.

During bathroom remodeling, one trade can easily pin the next trade against a bad decision. Our tile setter wanted the niche centered on the wall. The plumbing sat slightly into that space, so the plumber moved the obstruction before waterproofing. He lost some time; the finished niche landed where it should.

We installed the waterproofing through the shower floor, curb, corners, and niche. Every change of plane received another look before porcelain covered it. The enclosure opening was measured from the finished tile build-up, not from bare framing.

Tile and vanity

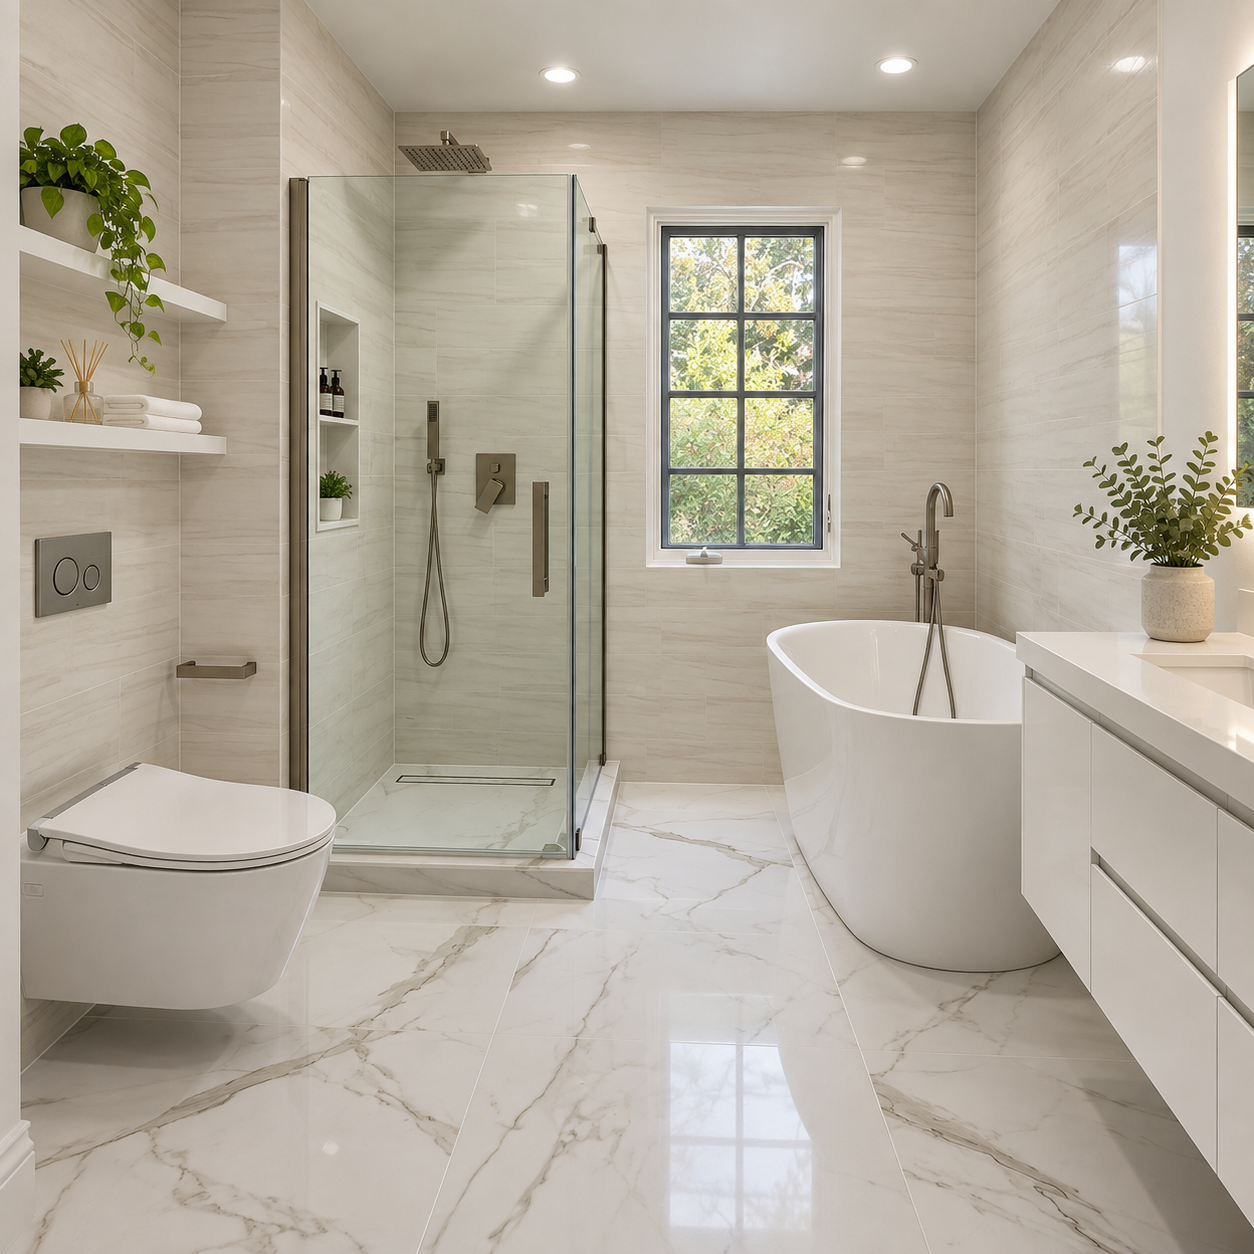
Large porcelain pieces went across the floor and continued up the bathroom walls. That reduced the number of grout joints, although it made the layout less forgiving. We dry-laid the first floor run from the shower and window lines. Two porcelain pieces was pulled back after the joint began drifting near the tub.

The tub stayed freestanding, with enough space around the edge for cleaning and access to the filler. Near the shower, one cut looked acceptable from the doorway but crowded the glass channel. We cut another piece. About twenty minutes, plus the usual search for the pencil that had just been in my hand.

The custom vanity changed the right side of the room more than expected. Its floating installation opened the floor below and gave the walkway a lighter feel. We set the cabinet level, checked the drawer clearance, then templated the top. Lists of bath remodeling companies may group that as “vanity installation.” On site, it is cabinet blocking, plumbing position, wall flatness, and a few small adjustments.

Light and air

We replaced the uneven work lighting with recessed ceiling lights and added task lighting at the mirror. The old ceiling opening also gave us access to improve the ventilation path. We checked the exhaust pull before closing the ceiling, because a quiet fan is useless when the duct connection is poor.

The window stayed central to the room, so we kept the tile courses balanced around it. One edge needed a small trim adjustment after the wall was flattened. Nobody noticed the correction afterward, which was the point.

Four-week handover

By the final week of bathroom remodeling, the glass enclosure, wall-hung toilet, tub, vanity, and trim were in place. We adjusted the shower door, checked the drain flow, ran every fixture, and tested the fan and lights. The last touchups was written on one sheet instead of being passed around in text messages.

The first silicone pass beside the vanity caught the mirror light and looked wavy. I cut that section out and ran it again. Final cleaup also took longer around the glass channel, where tile dust likes to hide.

If your search notes still say “bathroom upgrades near me,” bring the contractor the room dimensions and fixture specifications first. For a Sunnyvale remodel, we can walk the plumbing locations and shower layout before materials are ordered. That is the useful time to settle the scope.
bathroom remodel contractor san jose after pr-2

Bathroom remodel timeline

Week one access
Rough work week
Building the shower
Porcelain set
Glass came later
Last week checks

Week one access

The owner found us while searching “bathroom renovations near me.” The next message was more useful: remove the outdated tub area and build an easier walk-in shower. We had four weeks and a $14,000–$24,000 working range.


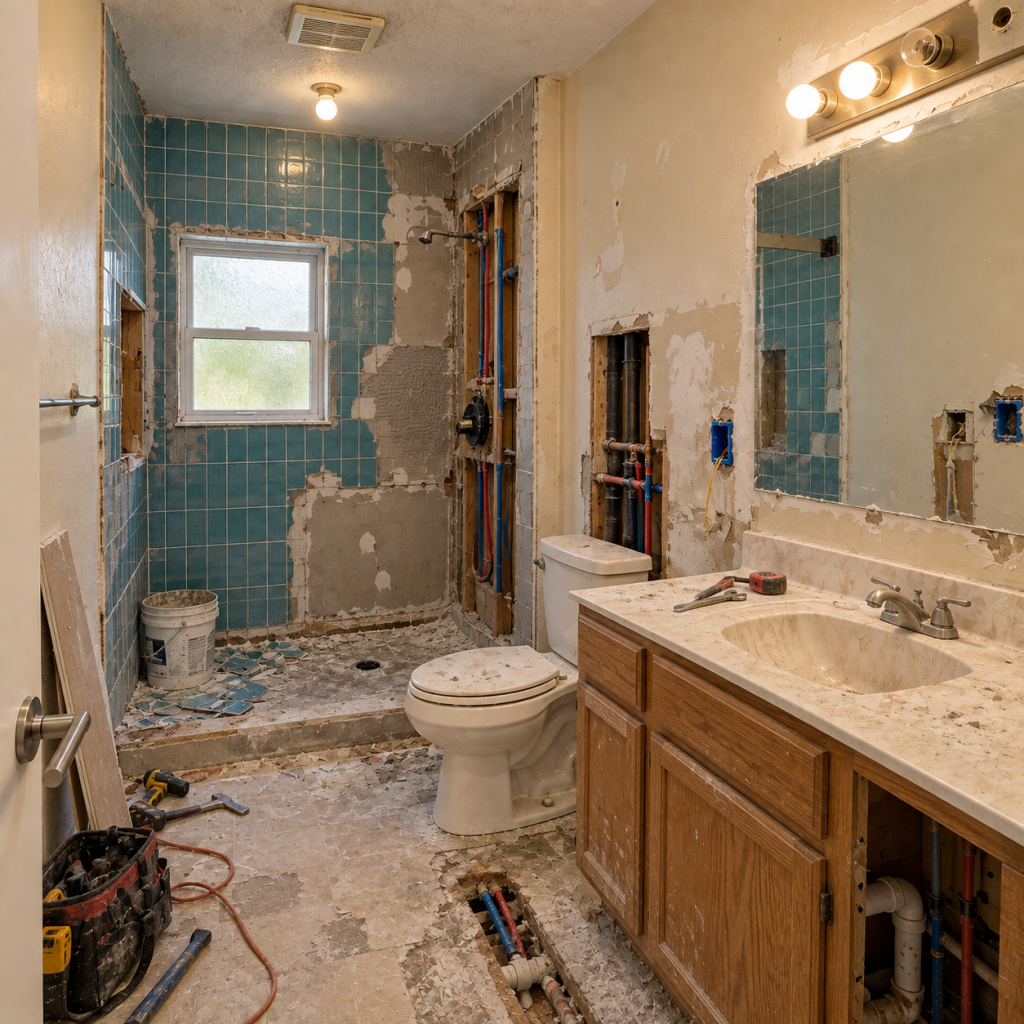
Part of the bathing area was already stripped when the progress work began. The old blue tile and backing was still hanging on several walls. We removed the loose sections and opened the plumbing side far enough to reach the supply lines.

The toilet and old vanity remained during early demolition. That left one narrow lane for tools, buckets, broken tile, and anybody heading toward the shower. The tool bag lived beside the door for most of that week.

A one day bathroom remodel was never realistic here. The shower base, plumbing, waterproofing, porcelain, and glass all depended on separate stages.

Rough work week

We used the open wall to set the overhead shower, hand-shower connection, and new controls. The existing water lines were accessible from the right side of the wet wall. We cleaned up the run before closing it.

The vanity plumbing was also exposed through the wall and floor. Its drain and supply locations had to match the new cabinet and sink. The old cabinet still gave us a useful reference point.

Two open electrical boxes was sitting around the mirror wall. We confirmed the switch and new light positions before patching. The old cieling light and exhaust area needed finish work later.

The owner had compared bathroom remodel contractors near me and expected the rough stage to take only a few days. Once everything was open, the trade overlap became obvious. Plumbing needed access before the wall and tile crews could move forward.

Usually not the best-looking week.

Building the shower

Bathroom renovations near me

We rebuilt the shower base where the old tub area had been. The new entry stayed lower and cleaner, without putting another tall edge between the bathroom and shower floor.

The pan needed an even pitch toward the drain. We checked it before waterproofing, then worked through the corners, threshold, window wall, and plumbing penetrations. The custom niche went into the left wall.

Its position depended on the framing and planned tile courses. Setting it wherever an empty stud bay appeared would have left awkward cuts around the opening.

The tile installer was ready for wall preparation while one plumbing section was still open. He moved to the floor layout until the plumber finished. Nobody stood around, although the shower wall waited.

Porcelain set

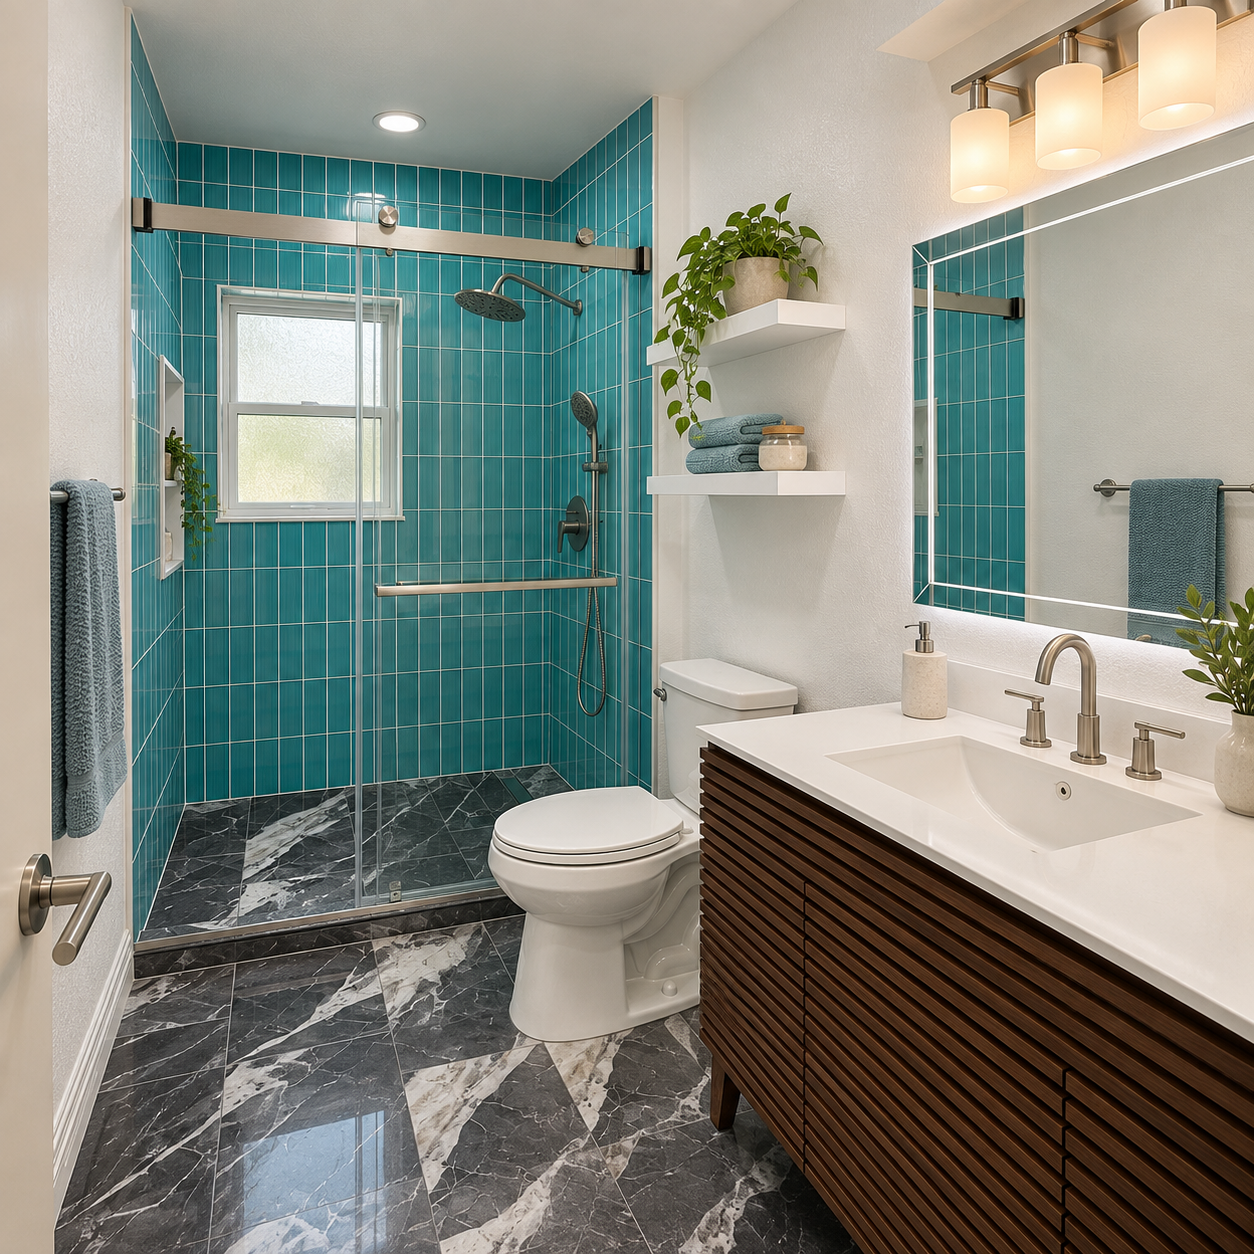
The shower walls received vertical teal porcelain. Dark marble-look porcelain went across the main floor and continued into the shower. The two finishes shared the room without trying to match each other.

We centered the back-wall layout around the widnow and carried the vertical joints into both corners. Narrow tile makes a drifting grout line easy to spot. The niche and fixture cuts also had to sit inside that grid.

The dark floor took more sorting than expected. Several pieces placed too much white veining directly in front of the vanity. We moved them toward the shower and mixed the floor run again.

Homeowners researching bathroom renovations near me often ask when tile starts. The honest answer depends on what we find after demolition. On this job, the plumbing and shower base had to be settled first.

Glass came later

The sliding glass could not be ordered from the open framing. Its measurements came from the finished porcelain, completed threshold, and actual wall faces.

That pushed glass toward the end of the schedule. While it was being prepared, we installed the dark slatted vanity, white countertop, faucet, mirror, and new lighting. The toilet returned after the floor work.

The shower received a rain head, hand shower, dark controls, and a long horizontal handle. Matte hardware sat well against the glossy teal tile.

The shelves above the toilet was installed after painting. Putting them up earlier would have made the short wall slower to finish.

People use quick bathroom remodel to mean different things. Setting finished fixtures may move quickly. Waiting for waterproofing, tile, grout, glass measurements, and fabrication is the part nobody sees in that phrase.

Last week checks

During week four, we set the glass enclosure, installed accessories, and finished the punch work. The sliding panels needed a small adjustment after the first fit. We checked the stops again before removing the protective film.

Both shower outlets were run separately. We watched the pan drain, checked the sealant joints, and tested the vanity plumbing. Lighting, switches, exhaust, and the toilet went through the same final pass.

After four weeks, the room still had its original footprint. The tub edge was gone, access was easier, and the glass kept the shower from feeling boxed in.

If you are comparing bathroom renovations near me, ask when the glass gets measured and what must finish before that visit. For a Santa Clara tub-to-shower project, those dependencies decide whether the proposed timeline is believable.

Small bathroom remodel San Jose after pr3

Bathroom contractor near me

A narrow work zone
Plumbing in the floor
Rebuilding the shower
Making storage fit
Tile and fixtures
Four-week closeout

A narrow work zone

The first message contained “bathroom remodel contractors near me,” followed by the useful part: small bathroom, weak storage, no room to expand. We had four weeks and a working budget between $13,000 and $21,000.

Bathroom contractor near me

Demolition was already well along when we opened the remaining sections. The old vanity was out, the shower tile was partly stripped, and the plumbing wall stood open. A floor trench ran beside the toilet toward the vanity rough-in.

The toilet stayed in the room during part of the rough work. So did a bucket, tool bag, drill, and whatever else had nowhere better to sit. Getting from the doorway to the shower required a little planning.

This bathroom remodeling job was mostly about inches. The room had enough length for a useful vanity and shower. It did not have spare width for mistakes.

Plumbing in the floor

The vanity drain and water lines were exposed along the right wall. The old supply lines was routed through the opened floor, so we could check everything against the new cabinet plan before closing the trench.

We marked the sink position, drawer banks, and cabinet depth on the wall. The drain needed to land inside the plumbing section instead of cutting through usable storage. Our plumber reset the rough-in, and I checked the cabinet drawing against it again.

The toilet remained close to its existing location. Moving that waste connection would have added work without helping the walkway. We replaced the fixture later, after the floor was ready.

One client question had been whether the vanity could be longer. It could. The harder part was keeping enough room beside the toilet and leaving the drawers somewhere to open.

Rebuilding the shower

We stripped the shower back and rebuilt the wet area inside the same general footprint. The wall surfaces needed preparation before waterproofing, and the shower pan had to work with the existing drain zone.

A large overhead head and a separate hand shower went on the left wall. We set the valve positions while the framing was accessible. The glass rail also needed backing before the wall closed.

The sliding enclosure solved a simple problem. A hinged door would swing into the toilet area or block the center aisle. The slider stays inside its own line.

The glass installer had to wait for the porcelain and finished curb. Rough framing dimensions were no use to him. Mortar, tile, and the final wall plane changed the opening enough to matter.

Making storage fit

The new vanity used nearly the full right wall. That gave the owner drawers, cabinet space, and a wide coutertop without placing a separate storage tower in the walkway.

We positioned the cabinet from the shower end and checked the toilet clearance before fastening it. Two drawer banks was also checked against the sink bowl and plumbing section. That took longer than setting the cabinet itself.

The dark finish made the storage run look more like one solid piece. It also gave the light floor and shower walls some contrast. A matching framed miror kept the right wall from turning into another large white surface.

Bathroom contractors near me appears in plenty of estimate requests. What I need after that is the vanity specification. Cabinet depth, sink position, and drawer layout tell me far more about the actual work.

Tile and fixtures

We ran light porcelain through the main floor and used a similar tone on the shower walls. Inside the pan, smaller dark pieces followed the slope toward the drain. Large pieces would have fought that pitch.

The first floor layout started from the shower opening and carried toward the doorway. We kept the long joints moving with the room. Turning them across the width would have broken the floor into short sections.

There was very little room for a lazy cut around the toilet and glass track. We dry-fitted those areas before setting them. The matte-finish shower trim and faucet went in after the grout work.

For bathroom remodeling in a compact room, the accessory locations matter too. We installed the towel bars on the open wall where they could be reached without crowding the glass.

Four-week closeout

The last stage covered the glass enclosure, toilet, vanity plumbing, lighting, mirror, and accessories. We adjusted the sliding panel and ran both shower outlets. The sink was filled and released while we watched the drain below.

The remaining punch items was kept on one sheet. A drawer needed adjustment, the glass stop needed another check, and one sealant joint received a second pass. Small work, but it still had to be finished before cleanup.

The room stayed inside its original footprint. Better storage, lighter porcelain, and a sliding shower enclosure made the aisle feel less boxed in.

If you are comparing local bathroom contractors, bring the vanity specification and preferred shower-door style to the site visit. Those details let us check the plumbing and clearances before materials are ordered.

Premium bathroom renovation

Remodeling bathroom contractors

Choosing remodeling bathroom contractors starts with a clear plan for layout, waterproofing, plumbing, electrical work and finish details.

What does a bathroom remodel include?

  • Demolition and preparation
  • Shower or tub replacement
  • Waterproofing and tile work
  • Vanity and countertop installation
  • Plumbing and lighting updates
  • Permit and inspection coordination when required

Plan the layout first

Confirm the shower, toilet, vanity, storage and door locations before selecting tile and fixtures. Good planning improves circulation and daily comfort.

Waterproofing and materials

Use durable materials designed for wet areas. Proper waterproofing behind tile helps protect the structure and reduce future moisture problems.